
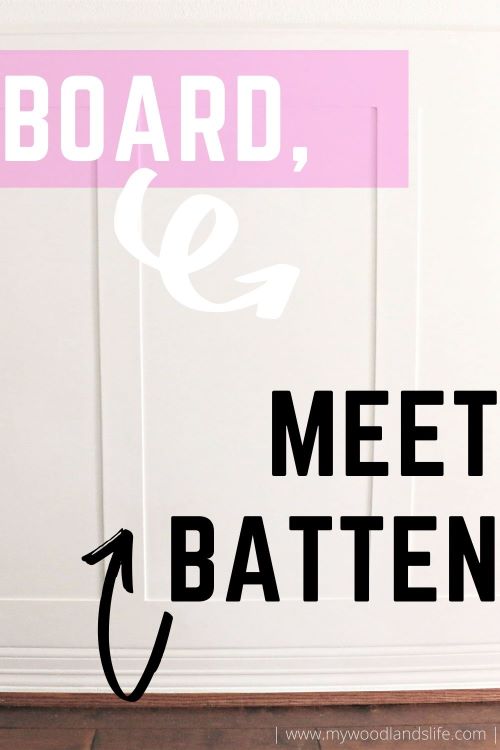
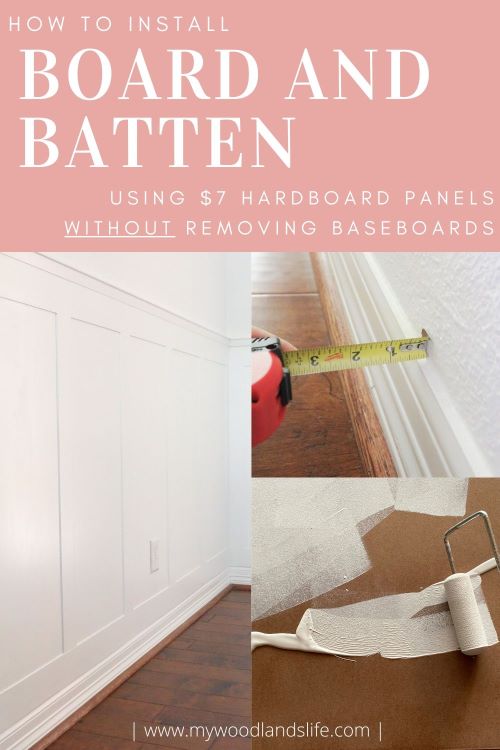
As a followup to my entryway reveal, I wanted to take some time and go into detail about the board and batten we installed in our downstairs entryway and main hallway. There are many wonderful resources online that provide step-by-step instructions for creating your own board and batten. Rather than reinventing the wheel so to speak, this instructional outlines the information you need to install your own board and batten using $7 hardboard panels for both the board and battens. This inexpensive option is ideal for anyone who (A) wants to save money and (B) does not want to replace their existing baseboards, but (C) still wants a professional-looking result.
THE BASICS
Board and batten is a shaker-style type of wainscoting. Unlike traditional wainscoting, which tends to have molded edges, board and batten is just flat pieces of wood with good ol’ right angle edges. It’s the easiest to install because you don’t have to miter edges like you do with traditional wainscoting.
The term board and batten dates back to early American construction when narrower, vertical pieces of wood (the “battens”) were used to cover the gaps between board siding on homes. We’ve since moved the style into our homes for aesthetic and sometimes practical purposes. In my case it was a combination of both. I wanted to add more texture to the wall in our entryway and hallway and, at the same time, protect said high-traffic walls from little fingers covered in food and dirt.
THE PROBLEM
While I very much wanted board and batten in our entryway and hallway, I wanted to install it myself without spending too much money. However, I kept hitting a roadblock in all of my board and batten research: my piddly preexisting baseboards.
A big trend in newer homes is to have nice deep baseboards along the base of the wall. Our house was built in the 1980s, and we don’t have that. The up side to our super thin baseboards is that there is less room for dust to collect. The down side is that it doesn’t leave much room for installing traditional board and batten.
I have possibly the thinnest baseboards I have seen (on Pinterest at least), but I wanted to keep them.
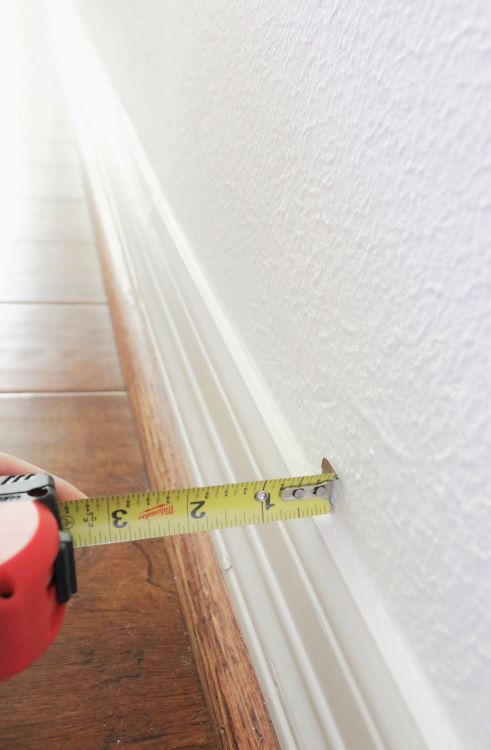
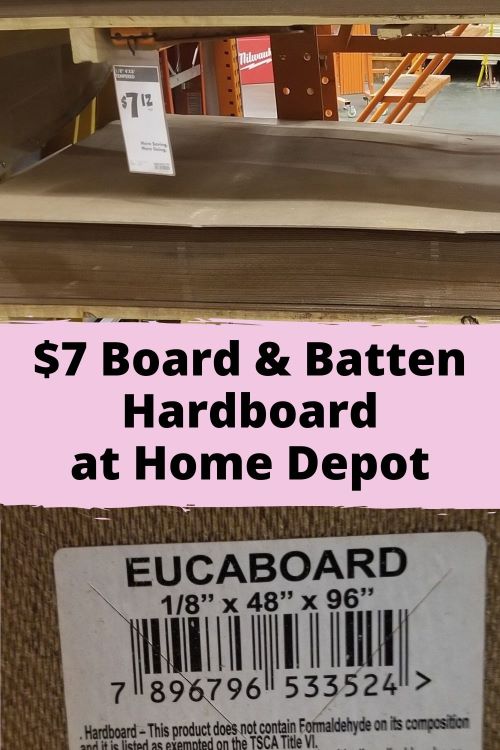
Enter the 1/8″ tempered hardboard panel. This inexpensive option runs a whopping $7.12 for a 4′ x 8′ panel at Home Depot. Based on my calculations, we had roughly a 1/4″ of baseboard to work with. Because the tempered hardboard panels are only 1/8″ thick, we were able to use them as the “boards” for the board and batten wall. We also cut down the 1/8″ thick hardboard panels to make the battens and other pieces for the board and batten wall.
The main downside to hardboard is that it absorbs water. In our case, we were installing the hardboard on top of our existing baseboard in a low-moisture area, so we weren’t worried about water issues. I would probably rethink the panel choice if we were installing it in the kids’ bathroom (they make waves), but a lot of the water concerns can be ameliorated with a good seal and paint job. Hardboard also tends to swell a bit when it is nailed, but it just took a bit more sanding effort to level it out.
TERMINOLOGY
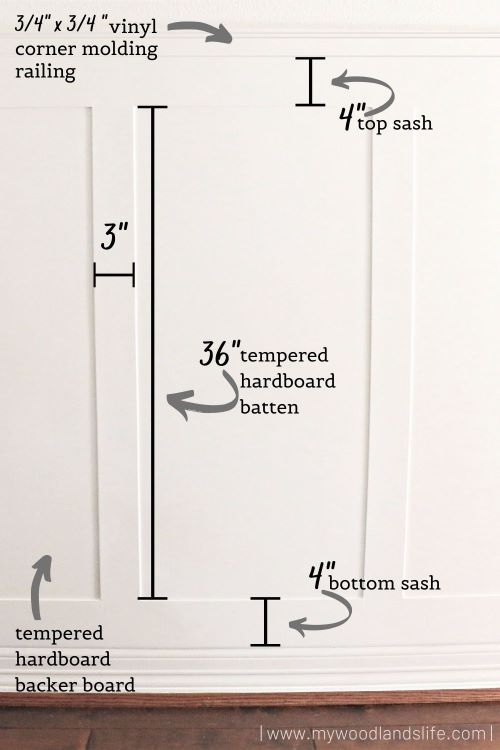
Before I continue writing about backer board, sashes, and battens, the measurements we used and the terminology I use for each piece are set forth in the graphic below (see the note in Step 8 for the railing details):
Of course every home is unique and every homeowner has their own personal preferences on style. But you can’t beat spending $7 for an 8-foot-long section of wall with ZERO demo needed. Continue reading if you would like to learn how we used inexpensive hardboard to make our board and batten walls.
SUPPLY LIST
TOOLS
- Orbital sander (we have an older version of this one
)
- Circular saw (we have this cordless one)
- Circular saw blade for cutting hardboard (we used one similar to this)
- Multi-tool or jig saw for cutting around outlets or molding (we have this multi-tool
- Brad nailer (we have this pneumatic one but the cordless nailers are much easier to set up and use)
- Air compressor (we have this one, but you don’t need it if you have a cordless brad nailer)
- Stud finder (I’m not a big fan of ours, so get a good one)
- Long level (we used one similar to this
)
- Small paint roller (I used one similar to this one
)
- Small foam roller pads (like these
)
- Paint brush (my favorite linked here
)
- 120 and 220 grit orbital sandpaper (this
multipack is useful)
MATERIALS
- 1/8 inch x 4′ x 8′ tempered hardboard panels (this link is for the 2′ x 4′ panel, but you can buy the larger 4′ x 8′ panel in store)
- 12 foot x 1-5/8″ x 11/16″ PVC drip cap (for the railing)
- Painter’s tape
- Primer (my favorite linked here)
- 1-1/2 inch brad nails
- 5/8 inch brad nails
- Liquid Nails Construction Adhesive (linked here
)
- DAP Alex Plus Acrylic Latex Caulk (linked here
)
- Wood filler (my favorite linked here
)
- High-quality durable paint (we used Benjamin Moore Advance Chantilly Lace in Satin)
STEP 1 : CHOOSE THE BOARD AND BATTEN STYLE THAT SUITS YOU
When you start to dig in, you’ll notice that there are tons of options when it comes to board and batten. In general, there are three different styles, mostly differentiated by height.
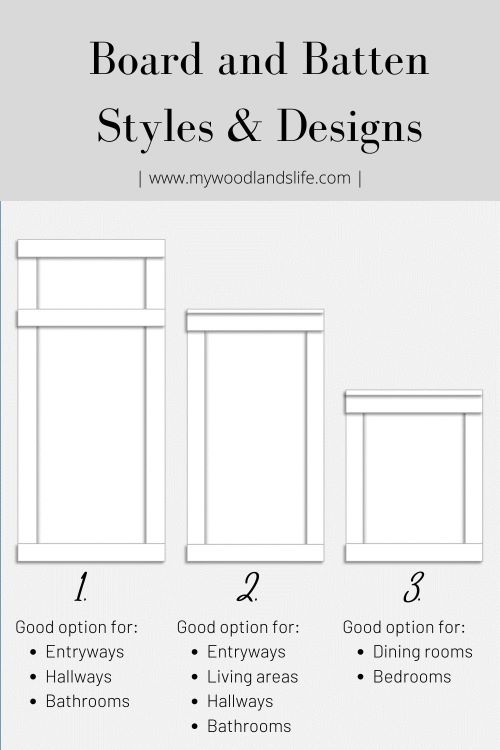
First, and most on-trend right now, is the tall board and batten with the added horizontal piece (Number 1). It can range from heights of 42″ to 72″, though there is no exact number (see below). This design is used a lot in entryways and bathrooms, and homeowners will sometimes hang hooks from the center railing of each panel for coats, purses, and towels. The added hooks give the board and batten a “farmhouse” look, which is also very popular right now. I have seen the tall version used in bedrooms and living areas as well, but it’s not as common.
Number 2 is very similar to Number 1, except it is missing the extra panel. It can go as high as 6 feet, but homeowners usually install it in the 40″ – 50″ range. Number 2 is arguably the most versatile option because the style works in almost every room without dominating the space. It is also less expensive than Number 1 because it doesn’t require as much material.
Both Number 1 and Number 2 are wise choices for powder rooms and bathrooms in which you want to add a more-wipeable surface around the toilet area (again, read: kids). Some people like to go with the taller options to save money on wallpaper, which is very much in style right now but pricey. And the taller board and batten invites color. With the lower 2/3 of the wall paneled, you can add a pop of color on the top 1/3 without it being too chintzy.
Then there is the classic chair rail height board and batten (Number 3). I’ve seen this a lot in bedrooms and dining rooms. The shorter style isn’t as popular as it used to be, though, as more people embrace neutral home decor and want the white (or sometimes dark) paneling to have more of a visual impact.
One other option that I did not include in the graphic but that is gaining traction in the design world is a variation in which a checkered board and batten pattern covers an entire wall. The trend is to paint the entire paneled accent wall a dark, moody color. The result is very cool, but you have to plan ahead with decor to counteract the dark color.
HEIGHT CONSIDERATIONS
There’s really no set formula for how high board and batten needs to be. However, you should consider (1) your material (2) the height of items around the paneling (windows and switches), and (3) the rule of thirds (that golden-ratio measurement that is pleasing to the eyes).
We chose the second option because (a) it was higher than the kids are tall, (b) we didn’t want to measure around the light switch covers and (c) it was less expensive material-wise than the third option.
If you are thinking about adding board and batten to your home, my recommendation is to go on Pinterest or Google Images and search “board and batten” and find what you like. Then take some painters tape and tape out your horizontal line on one of your walls. See what works best for you. Our board and batten panel ended up being around 50″ tall, including the preexisting baseboards.
STEP 2 – Measure Your Space
The best part about using the 4′ x 8′ hardboard panel is that you can use the entire panel to make an 8-foot long section of “board” for the area you want to panel. We also used the hardboard panel to make the horizontal sashes and battens. Accordingly, it’s pretty easy to determine the amount of material you will need.
Mr. L would argue that you should pre-plan out the entire space and go in knowing exactly what you need. I’m more of a go-with-the-flow DIYer, so I measured the total length of the wall we wanted to cover, bought a panel for each 8-foot span of wall, and then bought a few extra panels for the battens and top and bottom sashes. This is literally what my plans looked like:
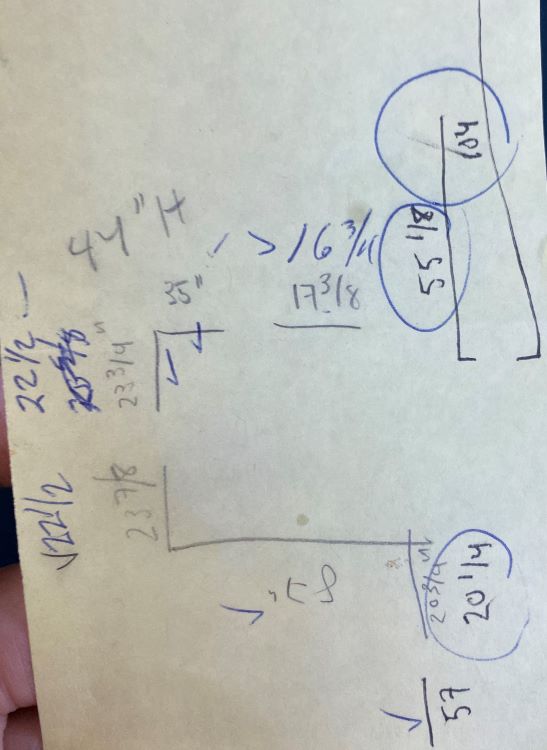
I basically sketched out our entryway and hallway floorplan and then measured the length of each wall. I will admit that we went back to the Home Depot one more time to pick up another panel and that Mr. L later corrected my measurements (in blue), so if you live far away from the hardware store or are more Type A than me, definitely pre-plan. But this is one of those projects that you can do a little bit at a time.
Step 3 – Sand and Prime the Hardboard Panels
To save time (and our lungs), we went ahead and sanded and primed all of our hardboard panels ahead of time in our garage before cutting and installing them inside.
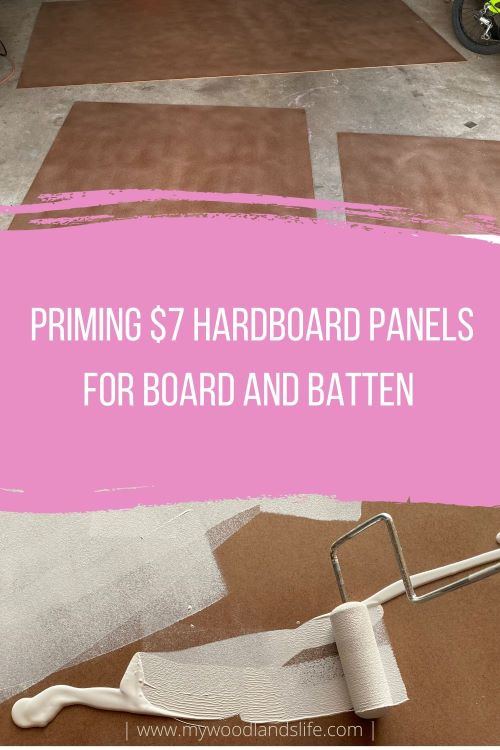
We lined up all of the panel pieces on the garage floor and went over them with 120 grit sandpaper on our orbital sander to rough up the surface. We then used a roller to apply my favorite primer.
The Zinsser Cover Stain primer is a beast. It is a lot thicker than other primers, so it definitely requires a light sanding with 220 grit sandpaper after it dries. But I only needed to apply one coat. Use it in a well-ventilated area because it is NOT low VOC.
STEP 4 – Cut the hardboard panels
Here’s the handy graphic again that shows the terminology I’m using along with the measurements for our boards:
Cut the Backer Boards
We used a circular saw to cut our backer board to a height of 44″ and saved the leftover four-inch strip for the bottom sash. Then we cut the 44″ panels to the length of each wall section. We were lucky in that almost all our wall sections were less than eight feet. But to avoid having any awkward seams on longer walls, you’ll want to plan on having a batten run along where the two panels meet. Or you can fill the gap with wood filler. We used our multi-tool to cut holes in the backer board for outlets.
This is what the backer board looked like before the top and bottom sashes were installed on top of it:
Cut the Battons and Sashes
In addition to the 4″ bottom sash that was left over from the backer board, we cut out a bunch of 4″ top sashes from another hardwood panel with the circular saw. We used yet another hardboard panel to make around thirty, 3-inch wide battens at 36-inches long.
I didn’t prime all of the batten and sash panels because Mr. L was leaving for a business trip and I needed his help with the install before I could paint them. But in an ideal world, everything would have been primed outside of the house.
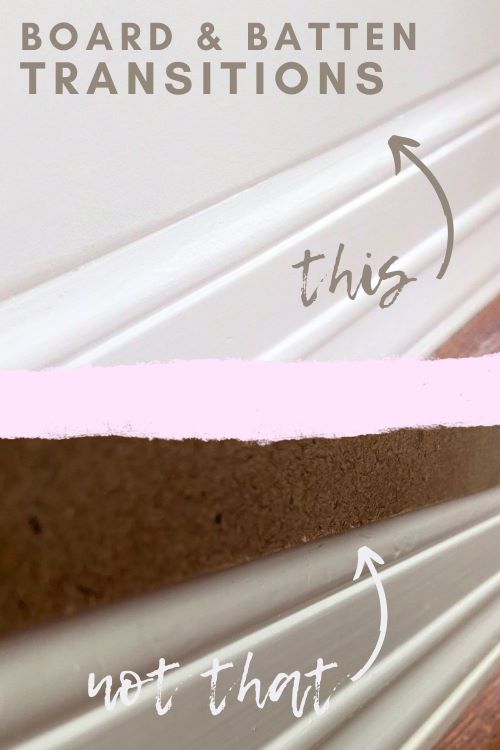
Step 5 (Optional) – Bevel the Bottom Sash
I mentioned above that my baseboards were roughly 1/4″ deep. And I said “roughly” because in some areas the 1/8″ backer board plus 1/8″ horizontal sash extended past my baseboard. To help with the visual transition of these two sections, I sanded the bottom half of the lower horizontal sash piece into a curve.
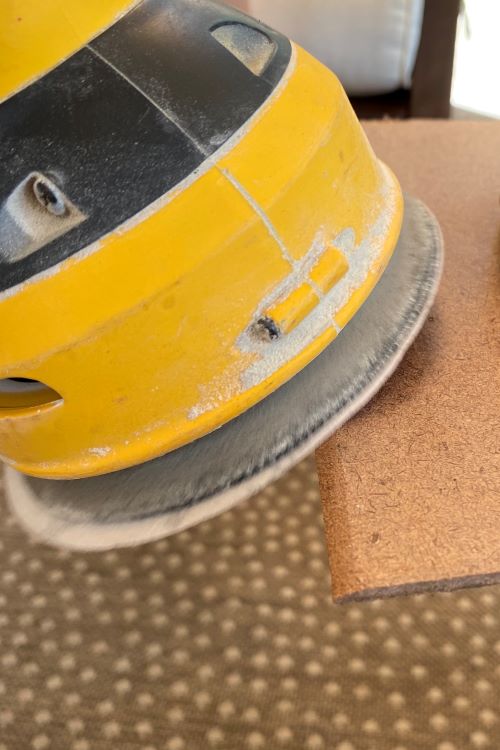
This beveling action took about 2 minutes per span of board. If you are working with more forgiving baseboards than mine, this beveling step is completely optional. But it’s not difficult to do if you have a sander.
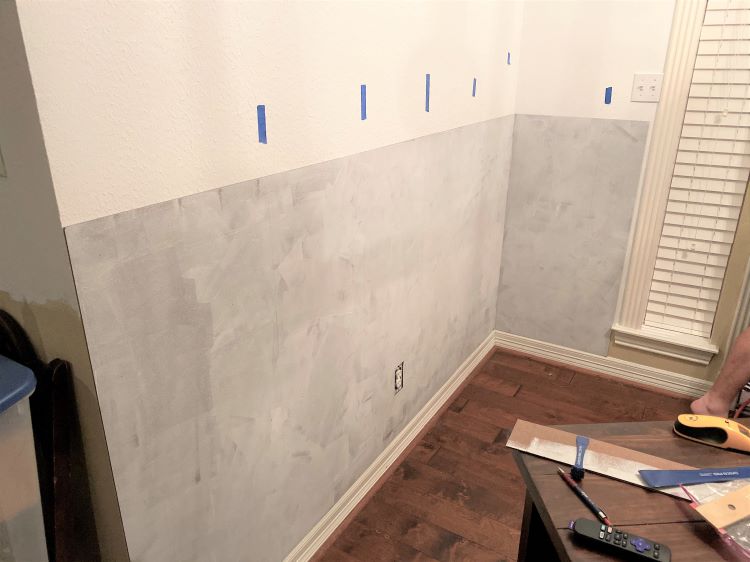
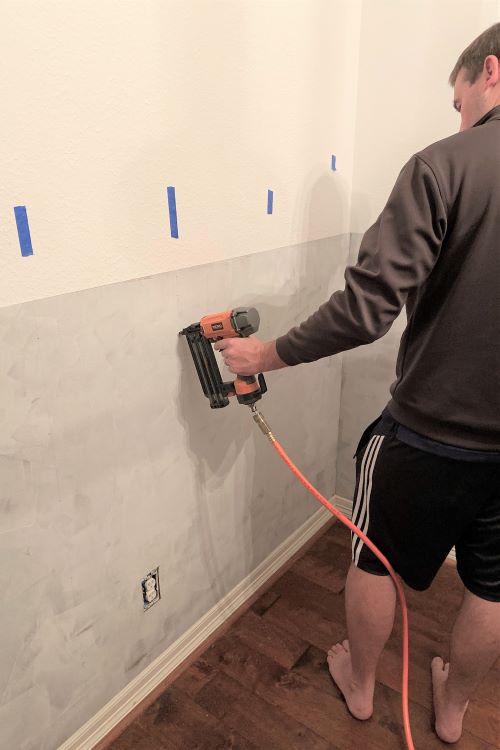
STEP 6 – Install the backer board
Before installing the backer board onto the wall, we first used a stud finder and marked each stud location on the wall with painters tape. Then I positioned the backer board to the wall while Mr. L loosely secured the board to the wall with a couple of 1-1/2″ brad nails. Next we used a long level and drew a line from the original stud marks to the bottom of the backer board. We secured the backer board along those lines using the brad nailer and 1-1/2″ nails.
We did not glue the backer board to the wall because we want to have the option to remove it at a later date if we are so inclined. Construction adhesive can do quite a number on your drywall if you try to remove it.
STEP 7 – Install the Top and Bottom Sashes
After installing the backer board, we nailed the top and bottom horizontal sashes directly on top of the backer board with 5/8″ brad nails, using the backer board as our guide. We DID glue the horizontal sash pieces onto the backer board before securing them with the nails.

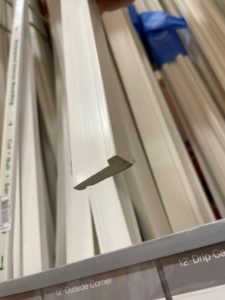
Step 8 – Install the Railing
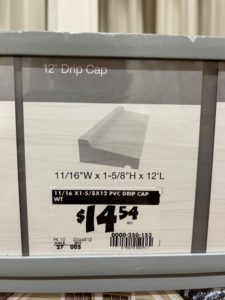
I ended up purchasing 12 foot x 1-5/8″ x 11/16″” PVC drip cap molding to use as a railing along the top rim of the hardboard panel and top sash. A reader kindly pointed out that I originally linked the incorrect molding, which I have corrected above. The graphic detailing all of the pieces I used still lists the incorrect “3/4″ x 3/4″ vinyl corner molding railing”–hoping to fix that soon! Below are photos from Home Depot of the drip cap molding we used:
And here is a close-up photo of the railing installed:
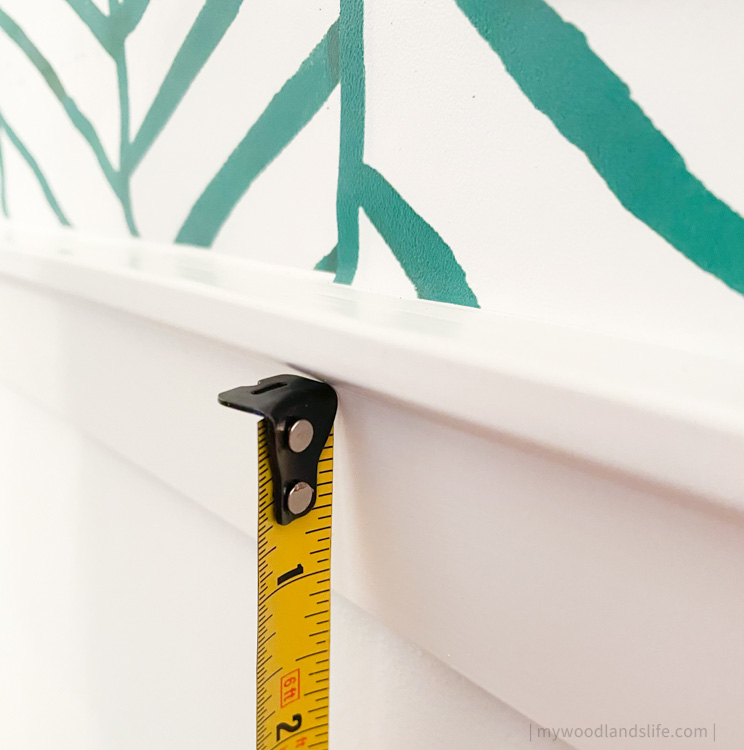
The railing helps hide any imperfections along the top of the wall where the top sash meets the backer board. Although I didn’t purchase the railing until after we installed the battens, it would be good to nail the railing to the wall after you install the horizontal sash pieces. You can use the stud markers on the backer board as a guide for where to place the brad nails.
STEP 9 – Space and Install the Battens
Now it’s time to install the battens! There are formulas for determining how to space battens (see Remodelholic’s instructions here), but I found those to be complicated. Instead, I used the “eyeball method” and then followed it up with a formula to determine the exact spacing I needed.
We already had a bunch of 3″ wide battens cut from one of the hardboard panels. I knew I wanted battens at each end of each wall section, so I went ahead and glued and nailed a batten piece to every end/wall corner with 5/8″ brad nails. Then, working on one wall section at at time, I grabbed a few more battens and taped them in place at a distance that I thought looked good.
Now for the formula. I counted the total number of battens I had on the wall (including the end pieces) and then multiplied that number by 3 inches (the batten width). I subtracted the total batten width from the total length of the wall section. Then I divided the resulting number by the number of spaces in between the battens. That number is the exact distance that needs to be between each batten.
Because you have already semi-spaced out your battens, your spacing should be pretty close to the number you arrived at by doing math. Adjust the battens accordingly and then glue and nail them to the backer board using 5/8″ brad nails.
You’ll see in the photo below that not all battens are spaced equally on different walls. You have to do what works for each individual wall spacing-wise.

Step 10 – Caulk, Fill, Sand, and Paint the Board and Batten
This is the step in which everything starts to come together. You will need to caulk around all of the seams with DAP, which should also fill in any gaps. Fill the nail holes with wood filler, but be sure to give the holes a good sanding with 120-grit sandpaper because the hardboard tends to bulge where it it nailed. After caulking, filling and sanding, it is time to paint all of the primed hardboard. I used two coats of paint on top of the primer.
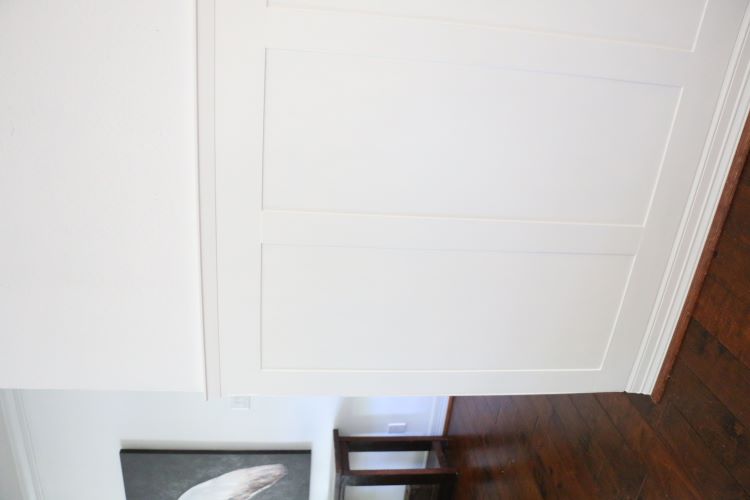
Step 11 – Admire Your Work
Mr. L asked me to mention that the project starts off looking a bit rough, which can be disconcerting to the non-serial-DIYer. I had done so much research leading up to this project that I knew how the finished product would look. But poor Mr. L went into this project blind and had no idea when and if it was going to turn out. (He is happy with the overall result now).
So if you have a significant other or roommate that is not familiar with the ins and outs of board and batten, tell them that it will look weird at first. But as soon as everything is primed and painted, they will start to see the end goal.
Please let me know if you have any questions or if I have left out any information. And feel free to pin the image below if you want to refer back to these instructions at a later date. I’m still painting rooms white over here! Will hopefully be doing a few more posts on that soon.


This is lovely! Can you post a closer pic of the top railing? I am following this tutorial for my own walls because I have the same base boards as you, but I am not sure exactly what you did on the railing. It looks the very top sticks out further than the sash below it. But the cove molding would not install that way. Thanks!
Hi Allison, thank you thank you thank you for pointing this out. You are absolutely correct. I thought I used the product number sticker from the molding when I searched for the link, but I apparently got it wrong. I’ve updated Step 8 with additional photos and information to give you an idea of the molding I used. As soon as I am able to make it to Home Depot in person, I will try to find the product number. I’m not having any success searching the website. If you need the molding sooner than later, hopefully someone at the Home Depot will recognize it from the “profile” photo. Best of luck to you! I’ll keep you posted when I get more details. -Lauren
Allison, I just updated the post again with the correct link to the molding along with a few photos that I took while at the Home Depot. It was actually 12 foot x 1-5/8″ x 11/16″” PVC drip cap molding. Hope this helps!