
Apologies ahead of time for bombarding you with Christmas and ornament DIY galore, but the playroom Candyland Christmas tree is finished! I wanted to share the sources for our tree along with more easy-to-make ornaments in case anyone else is gearing up for Christmas. If you are into the Candyland theme, keep on reading. If not, I will return to my regular DIY and–let’s face it–holiday postings next week.
First, the tree:
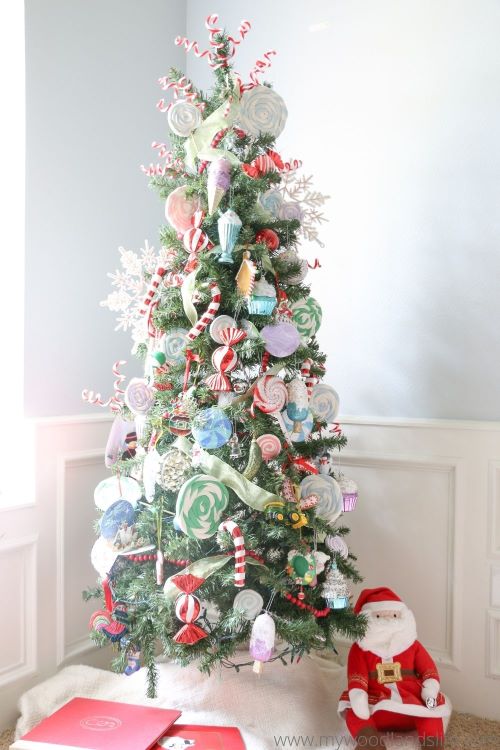
I couldn’t be happier with how it turned out. The mix of red and white striped candy keeps the tree looking traditional. But all of the purple and blue and pink candies add a cheery pop of color to the playroom. If you look closely, you can see that all of our non-candy sentimental ornaments still fit in too. And, most importantly, the kids had a blast helping make all of the ornaments.
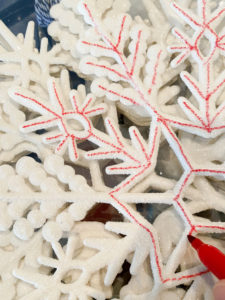
I think we got pretty close to the inspiration tree while staying within a reasonable budget. The colorful ice cream and cupcake ornaments from Walmart were $.99 each. The striped candy ornaments were $1.99 each at At Home. And the red wood bead garland was $5.99. The most expensive item was the six-pack of white snowflakes (another At Home purchase), which cost $7.99. I modified the snowflakes slightly with a red sharpie to make them look like candy canes:
In total, I spent less than $50 on ornaments and supplies, which I think is pretty good when starting with a blank tree.
Most of the big-impact decorations were homemade with supplies I already had on hand. Which brings me to the next part of this post: the DIY decorations.
Large 5-inch Lollipops
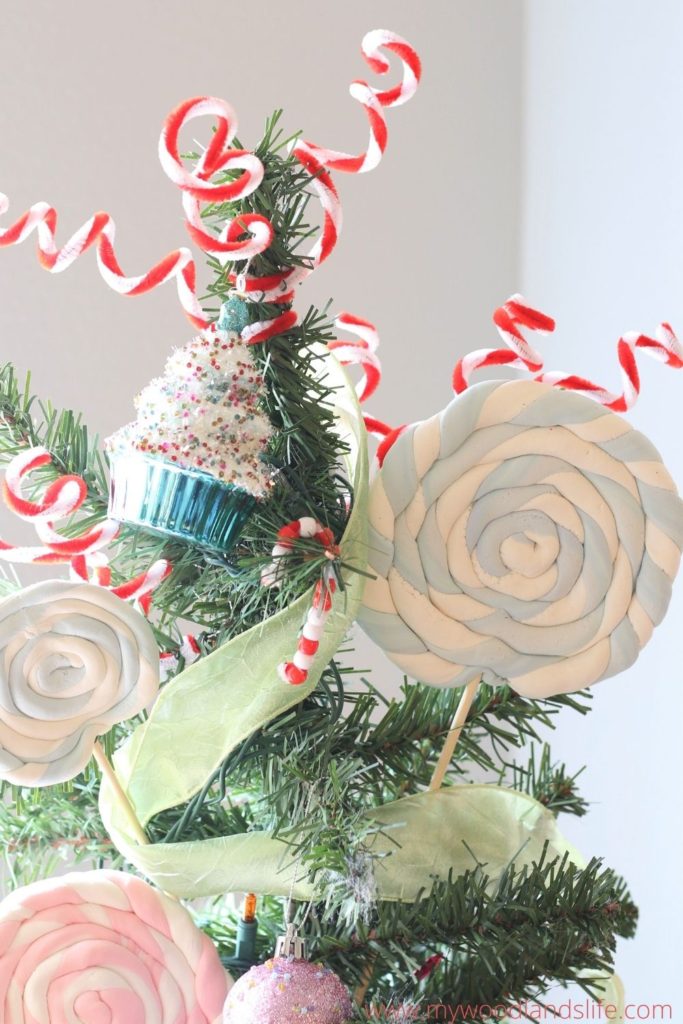
Hands down the colorful twisty lollipops are my favorite decoration that we made. We used Crayola Model Magic and kitchen skewers to form the lollipops. In case you missed last week’s post, find out how we made them here.
Smaller Spiral Lollipops
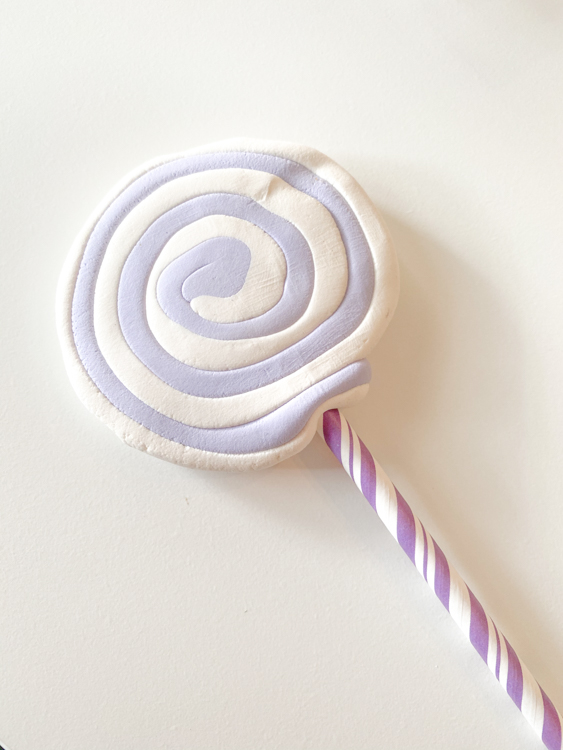
The process for making the smaller pops is similar to the larger lollipops. To make these, you’ll need the following supplies:
- Crayola Model Magic (white)
- Gel food coloring (I used colors from this multi-color pack) or washable markers
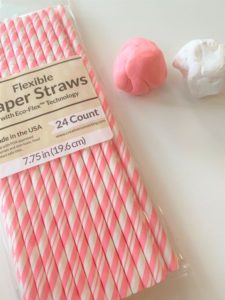
- Colorful straws or kitchen skewers
- Parchment paper
You start with two walnut-sized pieces of clay and color one half with gel food coloring or markers.
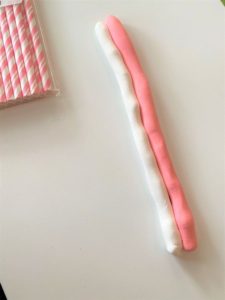
Working on a flat surface, form two “snakes” and press them together. Then work your way along the seam to square and narrow out the dual-colored snake. The key to a smooth swirl design is to keep the clay on your working surface the entire time to flatten out the back side. The back side will be the “pretty” side.
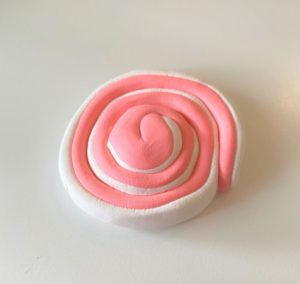
Finally wind the snake around itself to make a snail. Be sure to apply slight pressure to the top of the clay while winding so that it flattens out on the back side.
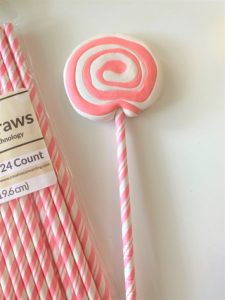
Flip it over, add a colorful straw or stick through the center, and you’re done! The clay takes about 24 hours to dry on parchment paper, but I was able to put it up on the tree after it dried overnight.
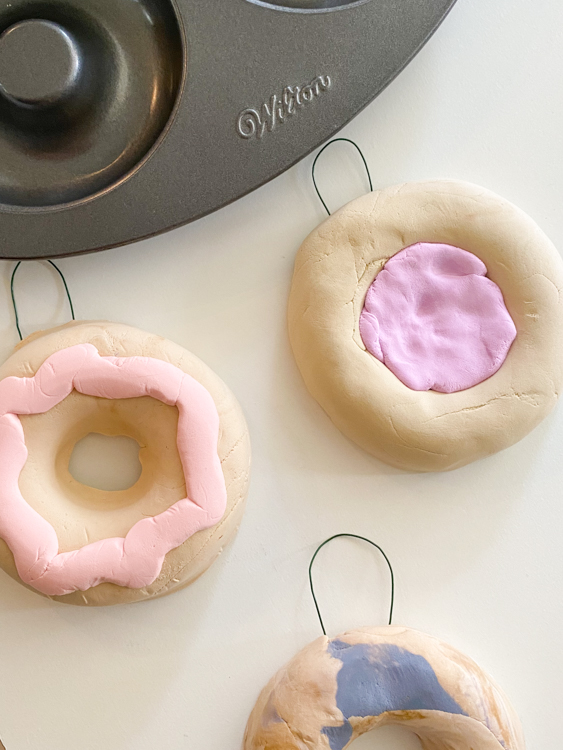
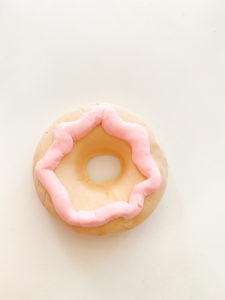
Donut Ornaments
The kids and I worked on this donut ornament project while the littlest was sleeping, and they had a lot of fun. The donuts are really easy to make. These are the supplies you’ll need:
- Crayola Model Magic (white)
- Donut baking pan (I have this one)
- Gel food coloring (I used brown from this multi-color pack)
- Washable markers
- Parchment paper
- Floral wire
- Small paperclips
- Scissors (to cut wire)
- Optional: glitter glue, glitter, beads or other decorations for “sprinkles”
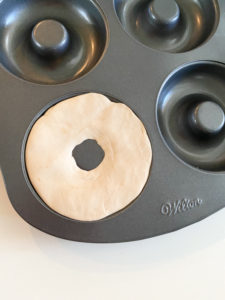
Start by measuring out how much clay you need by pressing it into the donut pan. Then remove the clay and use brown gel coloring to dye it a tan color. Note: washable markers don’t work for the brown color. Press the colored clay back into the donut pan and apply pressure so the donut will be smooth.
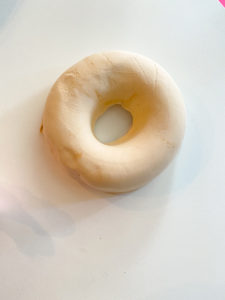
Carefully remove the donut from the pan. After smoothing out the edges, the donut should look like this:
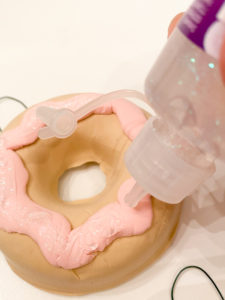
For an icing top, make a zig-zag pattern with a contrasting color on top of the donut.
It won’t be pretty at this point, but the next step will smooth it out.
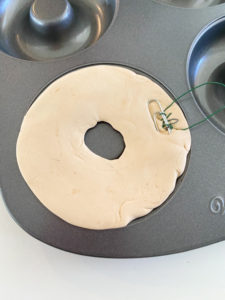
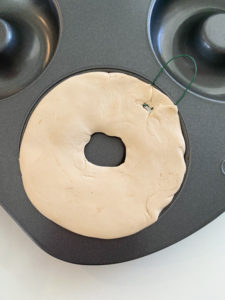
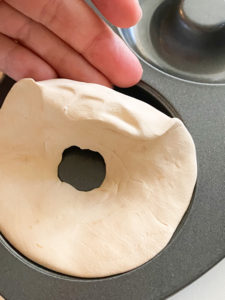
Take the donut with the topping and press it back into the donut pan. This should smooth out the topping layer. You’ll also want to add a hanger to the back while the donut is still in the donut pan. I wrapped floral wire around a paperclip and then inserted the paperclip into the back of the donut. Be sure to cover the paperclip completely with clay. Carefully remove the donut from the pan again and let it dry on parchment paper for 24 hours.
Once the donut is dry, you can add beads or glitter or glitter glue or even paint on decorations. Or leave it plain! My three-year-old opted to make a kolache out of her donut and stuck purple dough in the the hole. It turned out cute.
Wrapped Candy Ornaments
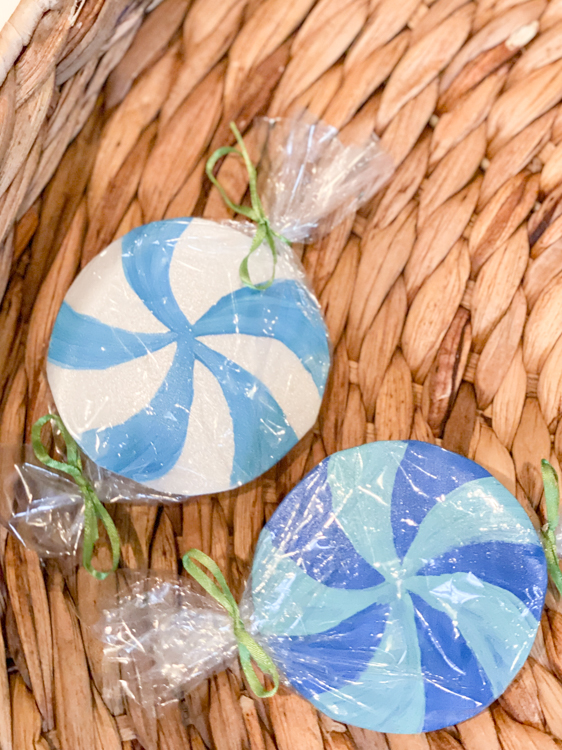
The wrapped candy ornaments are probably the easiest ornament to make. And by far the least expensive. You’ll need:
- Styrofoam dinner plates
- Cup or biscuit cutter
- Paint (I used paint pot strips)
- Cellophane bags (mine are the smaller bags you find in craft stores, but you could go bigger if you want larger candy)
- Paint brush
- Thin ribbon
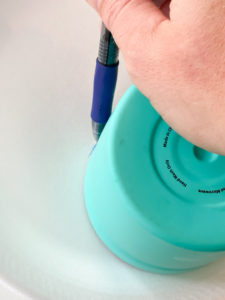
Find a cup or biscuit cutter that has a circumference around the same width as the cellophane bag and use it as a pattern to draw a circle on the styrofoam plate. I used a 12 oz. Bubba cup for ours.
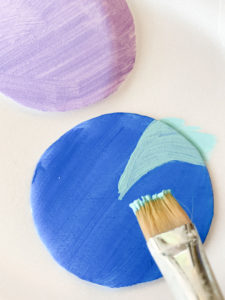
Cut out your styrofoam circle and paint it. We made solid colored candies and a few candy-striped ones.
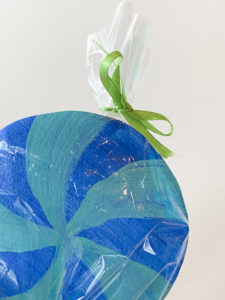
After the paint dries (around 5-10 minutes), insert the “candy” into the center of the cellopane bag. Tie off both ends and cut the closed end off of the bag. And you’re done!
Finishing Touches
After I finished decorating the tree, I added these red and white striped pipe cleaners to the top and sides of the tree:

I curled them around my finger to make them into a spiral and then attached them to a branch on the tree.
Then this weekend my sweet aunt, who had read last week’s post, sent me this adorable tree topper:
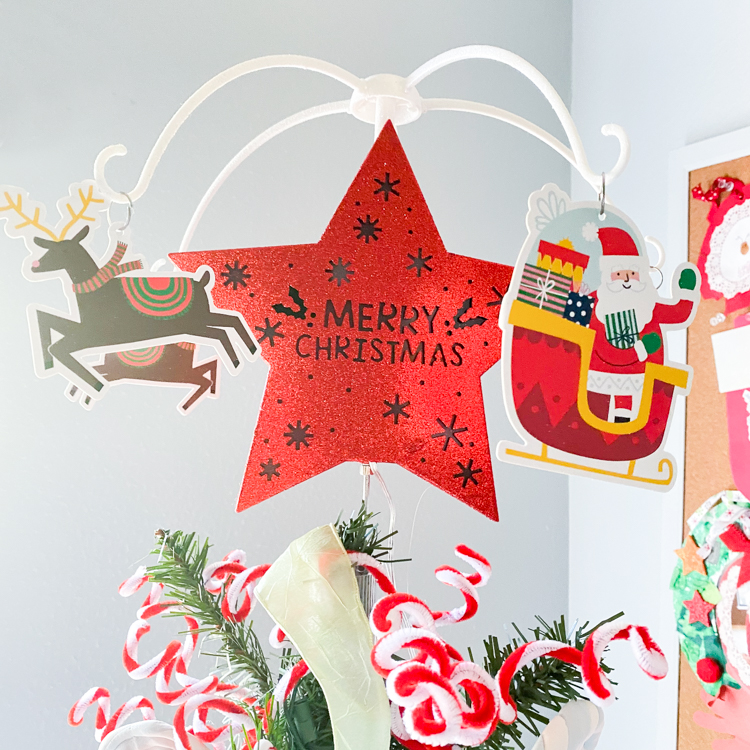
It is absolutely darling. It lights up and the characters on the top spin around. It’s a huge hit with the kids and the perfect cheerful adornment for our happy tree.
Final Thoughts
I hope you enjoyed these candy tutorials and seeing the completed tree. We certainly had a lot of fun putting it together. One thing I forgot to mention is that our tree is one of those inexpensive faux trees from Walmart. I think I paid around $25 for it a few years ago. Just a reminder that you don’t have to spend a lot of money on your tree if you put thought into the decorations ❤.


Leave a Reply