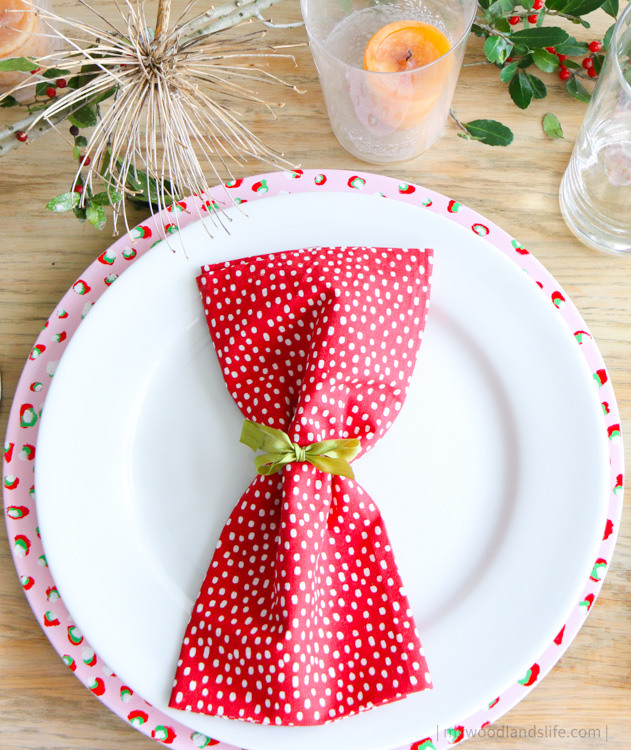
Good morning! I wanted to pop back on to share these DIY charger plates that I made for our Christmas table setting. They are incredibly easy to make and are relatively inexpensive to make considering the charger plate costs $2. They also require very little skill painting-wise.
Instagram Tutorial and Video
I’ve set out a step-by-step of how I made the chargers below. If you would like to watch a video of me painting the charger plate at the various steps, check out the highlights on my Instagram account (linked here).
If you prefer the print version, keep on reading.
Supplies
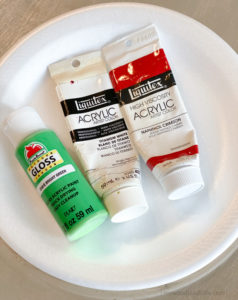
I made these plates using acrylic paint that I had in my craft closet, but really any acrylic paint would work. The only thing is that you may want a higher-quality (i.e., more pigmented) paint to do the base color. Otherwise, it will take quite a few coats.
- Plastic charger plates (I purchased these from Hobby Lobby. If you don’t have a Hobby Lobby nearby, check out these plates on Amazon. The Dollar Tree also sells charger plates for $1 each, but they have a beaded border around the edge, which I didn’t want.)
- Liquitex Professional Acrylic Paint in Titanium White (Amazon link)
- Liquitex Professional Acrylic Paint in Naphthol Crimson (Amazon link)
- Apple Barrel Acrylic Paint in Bright Green (This paint costs $1 at Walmart. Again, this is what I had in my craft closet, but you could make this color by combining green paint with a bit of white and yellow.)
- Paint brushes (I bought an inexpensive set on Amazon years ago similar to this one.)
- Palette knife for mixing paint (optional – included with the paintbrush set linked above)
- Plastic cup with water (for rinsing brushes)
- Paper towel
- Plate for mixing paint (I use cheap styrofoam plates from the grocery store.)
Painting Your Charger Plate
READ THIS FIRST: Remember that charger plates are the plates that go under your food plate for decorative purposes, sort of like a placemat. Because I knew food would never touch these plates, I was not concerned about using acrylic paint to paint them. I would not recommend painting plates that you will be using for food.
Step 1: Paint the charger plate pink
Start by using your palette knife or paintbrush to mix a grape-size dollop of white paint with quarter-pea-size bit of red paint to get the pink color. Add more red or white paint a little at a time to get the desired pink color. If you are using a paintbrush to mix the paint, dip your brush in a cup of water to wet it for easier mixing.
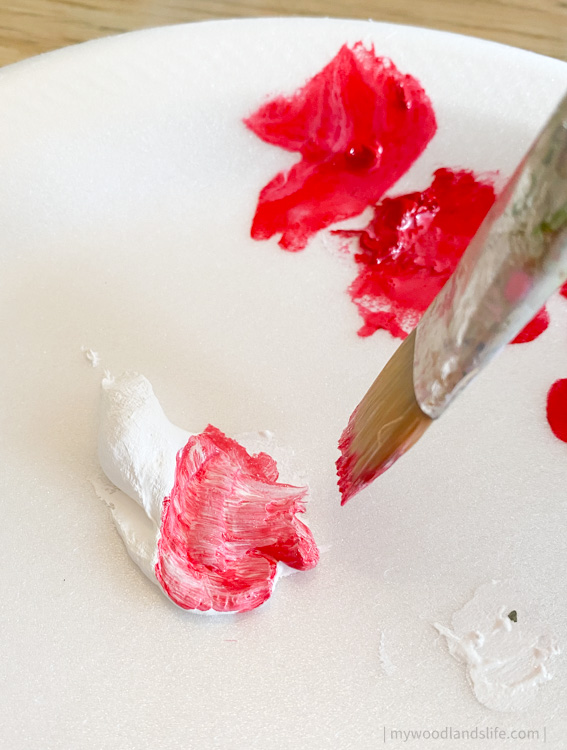
Use a large paintbrush to paint the now-pink paint onto the charger plate. You may need to wet your paintbrush so the paint goes on smoothly. The first coat should look like this:

It took me a total of three coats to achieve a solid pink backdrop on the charger plate. Make sure each coat is completely dry before painting the next coat. Also, paint the successive coats on LIGHTLY because acrylic paint is water-soluble and you do not want to wash away the undercoats.
Step 2: Paint red spots on top of the now-pink charger plate
This is the easy part. Take a smaller, rounded-tip paintbrush and use it to paint red spots along the outer rim of the charger plate.
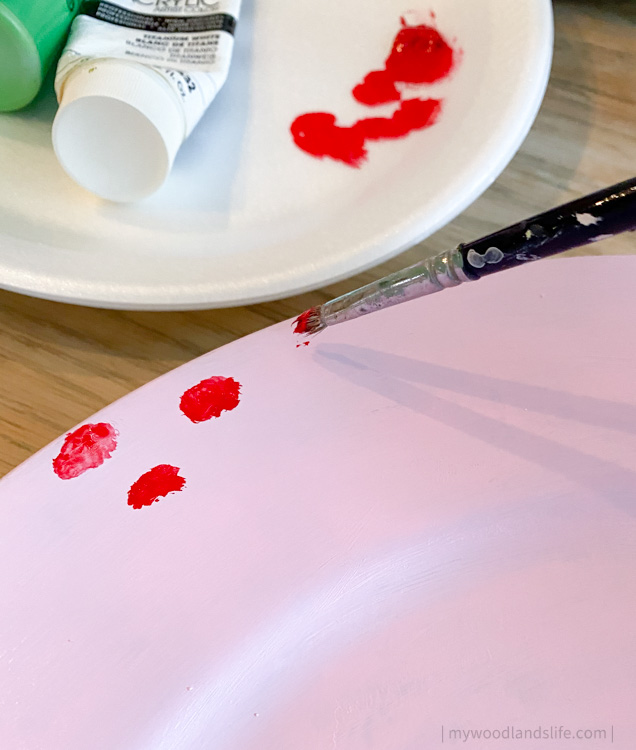
You do not want the spots to be uniform (or even perfect circles for that matter). Dab them on. Paint them on. Do whatever works for you to get a good variety of spots/splotches. And don’t forget to add some partial spots that (imaginarily) extend beyond the edge.
I painted the outer 1-inch border of my charger plates because the white dinner plates that I will put on top of the charger are quite large. However, you may need to paint a thicker border depending on the size of your dinner plate.
And in case you have Valentine’s Day on the mind, you could stop here.
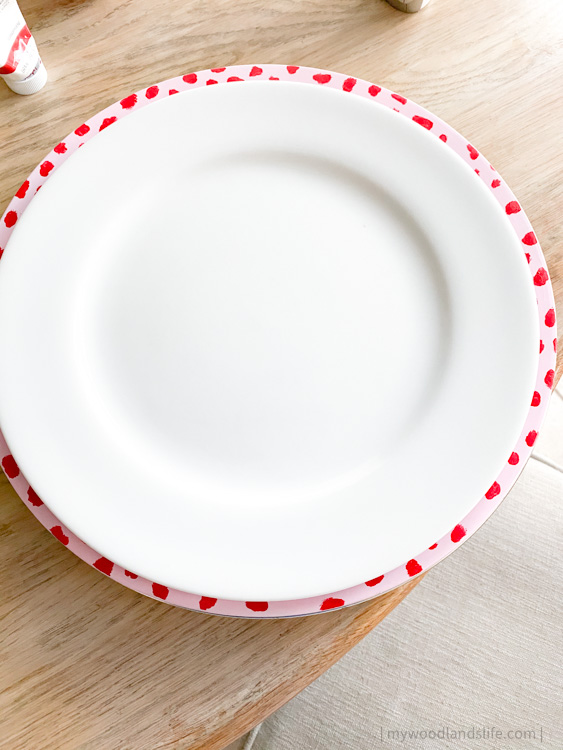
How cute is this charger with just the red dots? I may need to do a red heart version for the kids for Valentine’s Day.
Step 3: Paint green spots on top of the red spots
After the red spots dry, use the same brush to paint green spots on top of the red spots.
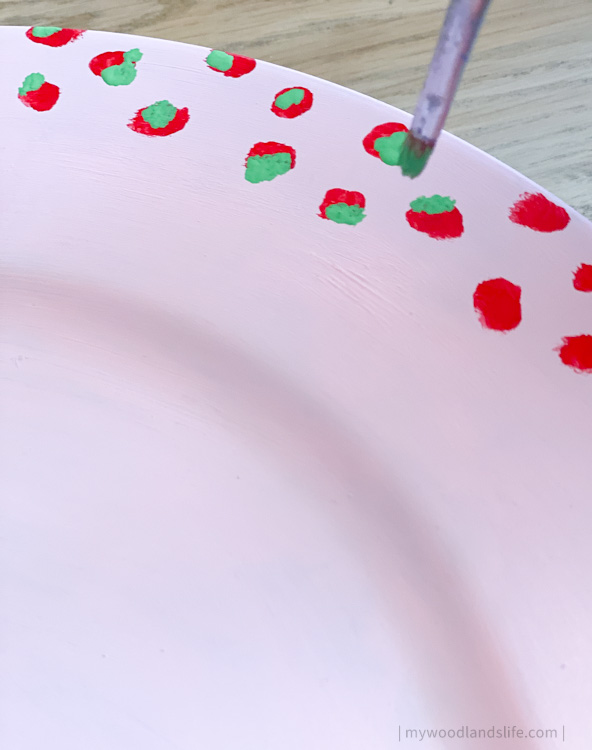
Use the same non-uniform approach–you’ll want some green spots to be larger than others. You’ll also want them to be on different sides of the red spots. Some can even be right in the middle.
Step 4: Paint small white spots on top of the green spots
When the green spots dry, use a smaller paintbrush to dab a bit of white on top of or to the side of the green spots.
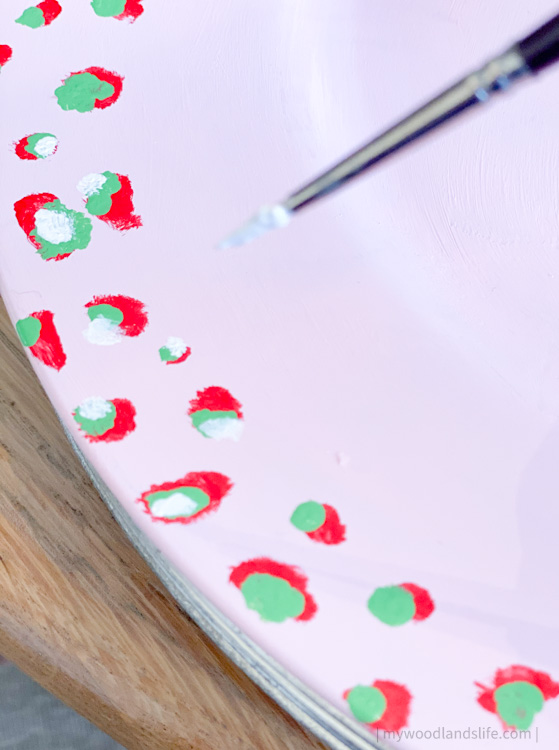
You may need to go back over the white when it dries and add a second coat to make it more opaque.
Protecting your painted charger plates
When you finish painting your charger plate, give it a good 24 hours to dry (although the final layer of white dots should be dry to the touch in less than 20 minutes). It probably takes longer than a day for the paint to fully harden and dry, but I did an test run over Thanksgiving, and the charger held up through the meal.
If you love how your chargers turned out and want to keep them (and store them) for the long-term, I recommend painting over them with Mod Podge (Amazon link here) or a similar sealer to protect the paint. I have not done this step yet because I want to use the chargers for Christmas and Mod Podge takes 2-3 weeks to cure. I will keep you posted on the results as soon as I do.
Finishing touches
I paired the charger plates with my white dishes and these cute red polka-dot napkins from World Market.
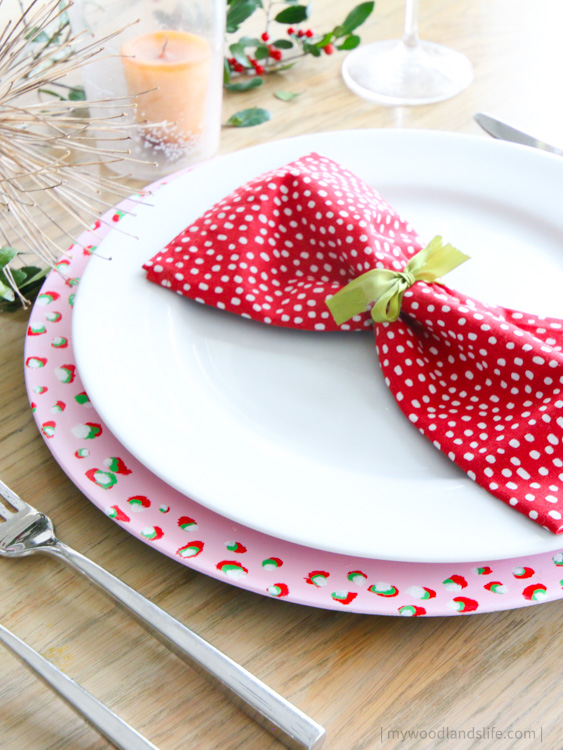
Then I decorated the center of table with holly branches that I found outdoors along with some votive candles in glasses. The star-like stem is from a dried agapanthus (those purple, sphere-shaped cluster of flowers that you see in the summer).
Now to decide what we will be eating for Christmas dinner!



Leave a Reply