
The kolache. It’s a controversial term in Texas vocabulary, but the result–whether it be fruit-filled or sausage-filled or pronounced kolach-EE or KO-lawtch (rhymes with “watch”)–is so delicious that even sticklers are willing to turn a blind eye to the term’s incorrect usage or pronunciation. Everyone agrees that kolaches start with a yeasted dough. However, some Texans will insist that kolaches have to be filled with fruit. Others will insist that their grandmother was Czech and ALWAYS put sausage in the kolache. A word to the wise, though: Do not ever EVER mention adding cheese to the sausage kolache because that’s pretty much blasphemy. But do go ahead and add the cheese because it really takes the kolache to the next level.
As you may have guessed based on the title of this post, our family (and, more specifically, Mr. L’s grandmother) belongs to that second group of kolache folk. And when Mr. L’s parents offered to share his grandmother’s sausage kolache recipe with me, I jumped at the opportunity to make them.
What follows is Mema’s recipe for sausage kolaches, but with a cheese addition. I also want to mention that, like all great recipes (and particularly those from grandmothers), there was never actually a “recipe” for Mema’s kolaches. Mr. L’s parents had the foresight to watch her make them one day and actually took the time to measure out each ingredient before she could mix them together. Kudos to their measuring skills because these turned out great!
Before you start–be aware that these kolaches take at least 2.5 hours to make. This is partly because the dough requires three risings. Additionally, this recipe makes A LOT of kolaches, so a good amount of time will be spent wrapping the sausage and cheese with the dough. You can always half the recipe, but I think the best option is to make the full version and share the extras with friends and neighbors. The kolaches should be stored in the refrigerator but taste as good as new after reheating them in the microwave for 20-30 seconds.
Sausage and Cheese Kolaches (makes approximately 35, four-inch kolaches)
Ingredients:
- 3 cups milk
- 1.5 sticks unsalted butter cut into pieces, plus more for greasing bowl
- 4 tablespoons salted butter
- 3 tablespoons Rapid Rise yeast (three packets plus 1 1/4 teaspoon from a fourth packet)
- 1.5 tablespoons sugar
- 8 cups all-purpose flour, plus more for dusting
- 2 eggs
- 1 tablespoon salt
- 12 packets of sliced American cheese or other easy-melt cheese (like Velveeta)
- 1 1/2 packages of sausage of your choice (I use the 14oz beef and pork jalapeño sausages that come in the horseshoe shape)
Make the dough:
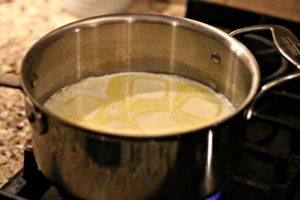
Scald the milk and add the butter to the heated milk. You’ll know the milk is scalded when small bubbles start forming along the edge of the pot. The milk will be around 180 degrees at this point and needs to cool to 130 degrees before it can be added to the dry ingredients. This can take some time if the milk is left on the pot on the stovetop. To speed up the process you can pour the milk into another bowl and let it cool there or, if you do not want to dirty another dish and are not in a hurry, wait. I highly recommend using a digital thermometer (I use this one) to check the milk temperature before you add it to the dry ingredients.
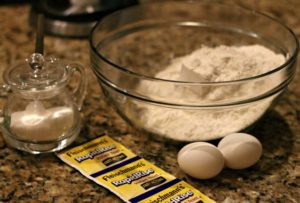
While waiting for the milk to cool, add 4.5 cups of flour, the yeast, and the sugar to a large glass bowl. Mema’s recipe called for 3 tablespoons of “dry yeast.” I prefer using the Fleischmann Rapid Rise brand, and the rise times in this recipe are based on the Rapid Rise yeast. You’ll need to use three full packets of Rapid Rise yeast plus 1 1/4 teaspoon from a fourth packet.
When the milk and butter mixture has cooled to 130 degrees, pour it into the dry ingredients. Add the two eggs to the bowl and mix with a whisk until the eggs and liquid are incorporated into the dry ingredients. Be sure to mix in the flour that gets stuck at the bottom of the bowl! Scrape down the sides of the bowl with a rubber spatula, and cover the bowl tightly with plastic wrap.
Let it Rise:
Move the dough to a warm place and let it rise for thirty minutes.
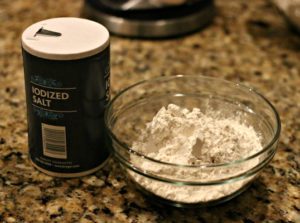
While waiting for the dough to rise, mix 2 cups of flour with 1 tablespoon of salt in a small bowl. Set aside.
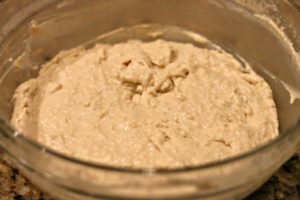
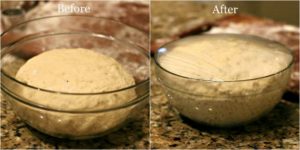
After thirty minutes, the dough should look like the above picture. If it doesn’t, give it a little bit more time to rise. After the first rise, it’s time to start incorporating more flour into the dough. The dough will be very sticky and spongy looking.
Work the dough:
Use a mixing spoon to deflate the dough and add your flour and salt mixture to the bowl. Work the flour and salt mixture into the dough with the spoon. The dough will still be pretty sticky at this point. If you’re having trouble incorporating all of the flour, go ahead and turn it onto a floured surface and start kneading it in.
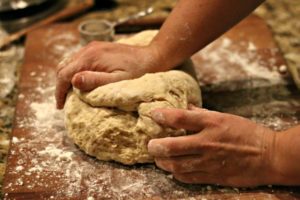
Now comes the part that takes a little bit of patience. If you haven’t done so already, turn your dough onto a surface that is dusted with flour. Start adding more flour to the dough, an 1/8 of a cup at a time, and knead it in with your hands. I sprinkle a little bit of flour underneath the dough and then on top and knead the dough until it starts sticking again. Then I add more flour and knead some more. Repeat this process until the dough is smooth and no longer sticks to your hands. I ended up adding an additional 1.5 cups of flour to the dough before it reached the desired consistency.
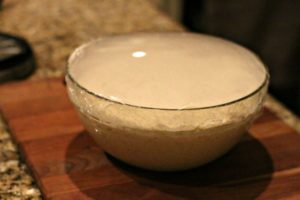
Form the dough into a ball and place it in a large, glass bowl that has been greased with butter. Cover the top tightly with plastic wrap. Let the dough rise in a warm place for approximately forty minutes. The dough should look like the above picture after the forty-minute mark. If not, let it rise a little longer.
Prepare the filling:
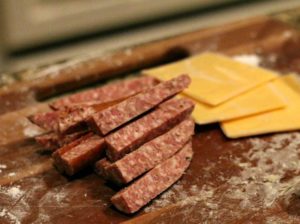
While the dough rises, start getting your sausage and cheese ready. I use the 14oz sausage that comes in the horseshoe shape and cut it in half and then each half into thirds. Then I quarter each section into four wedges as shown above. Cut each slice of American cheese into thirds (although after having it both ways, Mr. L and I prefer using a Velveeta-type cheese).
Put it all together:
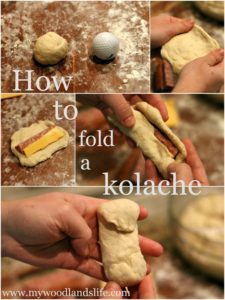
Once the dough has risen for a second time and the cheese and sausage are prepped, you can start putting the components together. Take a golf ball sized piece of dough (Mr. L would argue squash-ball size, but you get the point), use your fingers to stretch it out to the length of your sausage wedge, add the sausage and cheese, then close it up. Be sure to completely seal the ends so the cheese doesn’t melt out when the kolaches cook. Put the kolaches on a baking sheet a few inches apart. After you fill up one baking sheet (a standard baking sheet will fit around 9 kolaches), move to the next step and then come back and finish forming the kolaches.
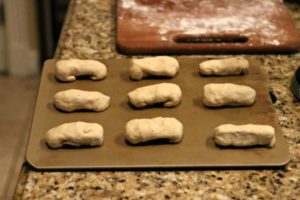
Bake:
Preheat your oven to 350 degrees (I highly recommend investing in an oven thermometer like this one because most ovens’ temperatures vary), but do not bake the kolaches yet. One more rise is required. Move the baking sheet to a warm place and let the kolaches rise for 20 minutes. Work on forming additional kolaches while waiting for each batch to rise. After 20 minutes, brush the top of the kolache with melted butter. Bake the kolaches for 15-20 minutes until the top of each kolache is a golden brown.
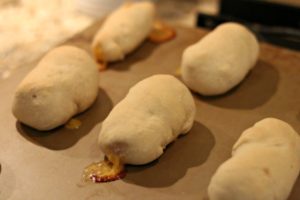
And voila! Enjoy the fruits of your labor (but see the note below). And do not cry over melted-out cheese. In truth, it is impossible to prevent this from happening on every kolache.

An important note: If you, like I, are starving at this point and want to immediately sample your kolache, cut it in half first to let some of the heat and steam escape. Otherwise, the cheese has a molten lava effect on your mouth and ruins your day (and taste buds).
Sausage and Cheese Kolaches
Authentic Czech sausage kolaches (with cheese!). The yeasted kolache dough is the perfect breading for the warm sausage and melted cheese.
Ingredients
- 3 cups whole milk
- 1.5 sticks unsalted butter (cut into pieces, plus more for greasing bowl)
- 4 tbsp salted butter (for brushing top)
- 3 tbsp Rapid Rise yeast (3 packets plus 1-1/4 tsp from fourth packet)
- 1.5 tbsp sugar
- 8 cups all-purpose flour (plus more for dusting)
- 1 tbsp salt
- 12 packets sliced American cheese (or other easy-melt cheese)
- 2 14oz packages of sausage (I used beef and pork jalapeño)
Instructions
-
Scald the milk and add the 1.5 sticks of butter to the heated milk. Set aside.
-
While waiting for milk to cool, combine 4.5 cups of flour, the yeast, and the sugar to a large glass bowl.
-
When milk and butter mixture has cooled to 130 degrees, pour it into the dry ingredients. Add the two eggs to the bowl and mix with a whisk until the eggs and liquid are incorporated into the dry ingredients. Scrape down sides of bowl and cover the bowl tightly with plastic wrap.
-
Let dough rise in warm place for 30 minutes.
-
Mix 2 cups of flour with 1 tablespoon of salt in a small bowl. Set aside.
-
Bring risen dough to work station and use mixing spoon to deflate it. Add the flour and salt mixture to the bowl, working it in with the spoon. Once incorporated, turn the dough onto a floured surface and start kneading it.
-
Add additional flour to the dough, 1/8 cup at a time, and knead in each addition. Add flour until the dough is smooth and no longer sticks to your hands. (I added an additional 1.5 cups of flour).
-
Form the dough into a ball and place it in a large, glass bowl that has been greased with butter. Cover the top tightly with plastic wrap. Let dough rise in a warm place for approximately 40 minutes.
-
While waiting for dough to rise, quarter sausage and cut into three-inch lengths. Cut cheese into thirds.
-
Bring risen dough to work station and deflate. Take a golf-ball sized piece of dough and stretch it out to length of sausage using your fingers. Add sausage and cheese to center of dough, then close it up. Be sure to seal the ends so the cheese does not melt out.
-
Preheat oven to 350 degrees.
-
Put kolaches on a baking sheet a few inches apart. Move baking sheet to a warm place and let the kolaches rise for 20 minutes. Work on forming additional kolaches at this time.
-
After 20 minutes, brush the top of each unbaked kolache with melted, salted butter. Bake for 15-20 minutes until the top of each kolache is a golden brown.

Leave a Reply