
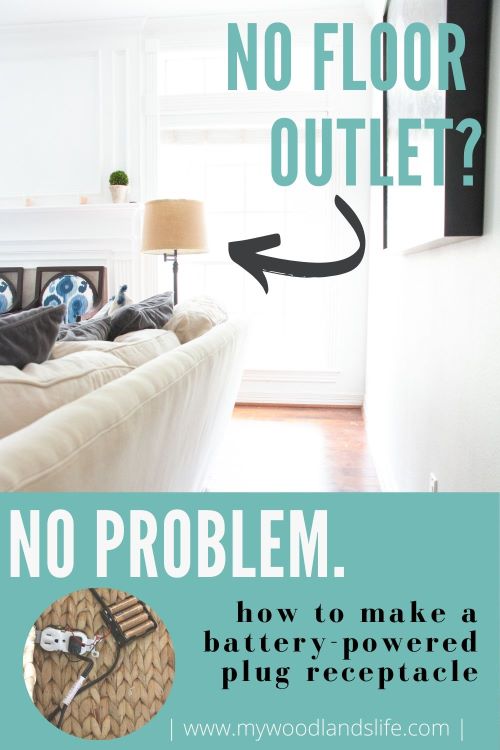
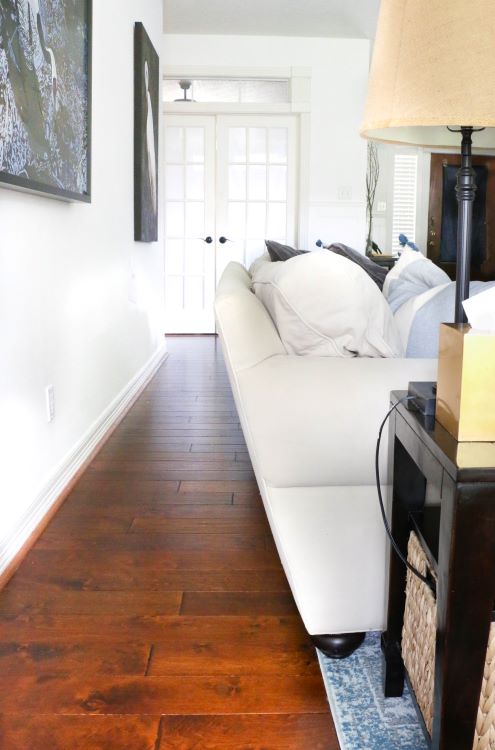
Hello all!! Today’s post is a quick tutorial on how to make a battery-powered outlet that you can use to power low-voltage DC electronics—in this case a 12V lamp. It’s a great way to deal with lighting in the middle of a room when you have floating furniture and only wall outlets (like my living room here). You can put your lamp wherever you want and don’t have to worry about people tripping over cords.
Notably, since I first wrote this post back in 2020, several products have emerged on the market that fill the gap for the issue I was originally trying to solve. For example, you can purchase a lightbulb kit on Amazon (linked here) that includes a rechargeable lightbulb that screws into a standard lamp base and also a plug cap that converts the lamp fixture into a wireless lamp. That would be the simplest way to make a lamp functionable if you do not have an outlet nearby. If you are inclined to try the DIY method, keep reading.
PLEASE NOTE: This battery-powered plug receptacle is for LOW-VOLTAGE electronics only, like the 12V lamp. The batteries cannot power your usual 120V electronics. I have only used it on the 12V lamp, and I would not recommend attempting to power any other device unless you are confident about the voltage requirement of the device.
This lamp hack was admittedly the brain-child of my husband, so I take no credit. But I have to share it because it is so simple and so genius. Plus it’s non-destructive to the lamp.
MATERIALS
- Battery pack (8-slot) and snap connector kit (Amazon link here
)
- 12V LED bulb. I recommend using a 3 watt 12V bulb (Amazon link here) if you want the light to last a long time on the battery pack. Our 3 watt bulb ran for 10+ hours on the battery pack. We originally purchased a 10.6 watt bulb from the Home Depot, but after conducting a follow-up experiment on battery run-time, we determined the battery pack could only power the 10.6 watt bulb for less than 2 hours. Amazon also carries other lower-wattage bulb options.
- Wall receptacle/outlet (Amazon link here
)
- Phillips head screwdriver
- 8 AA batteries (preferably rechargeable)
- Lamp
STEP 1
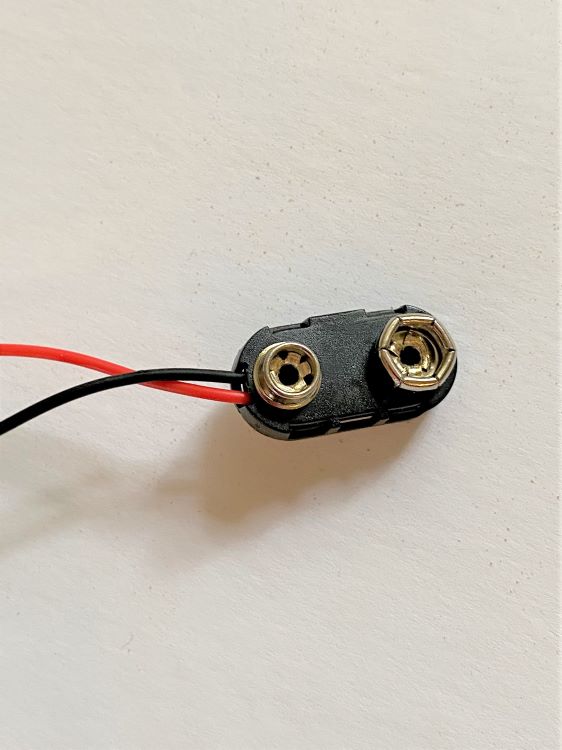
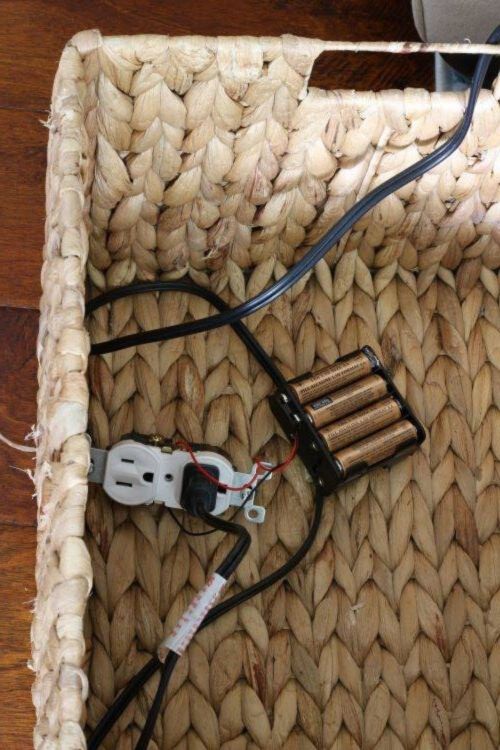
The battery pack kit comes with a snap connector that looks like this:
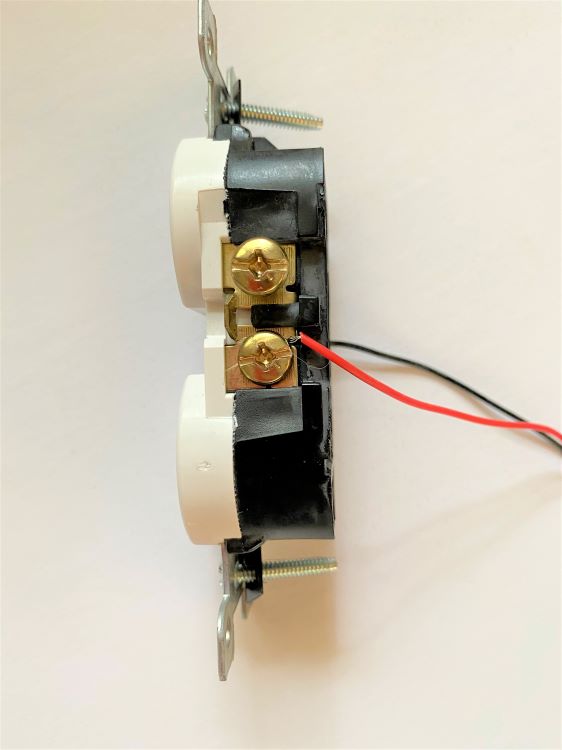
Attach the red and black wires to opposite sides of one outlet (either the lower or the upper) on the receptacle. In other words, choose an outlet, place each wire under each screw on either side of the outlet and gently tighten the screws to secure the wires.
STEP 2
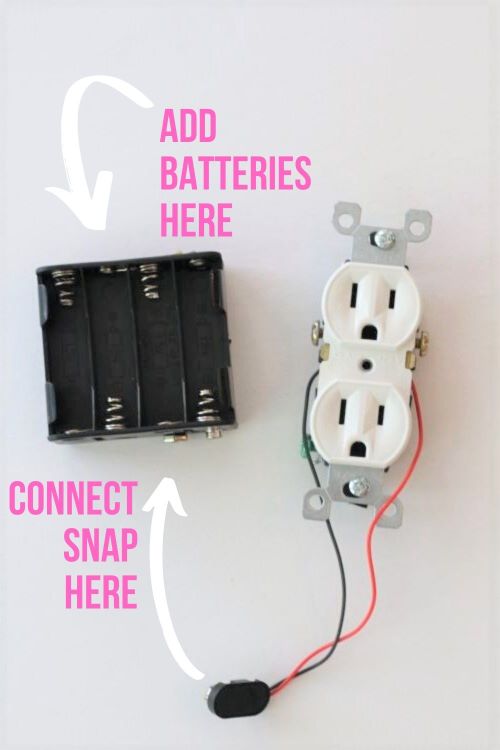
Load the battery pack with batteries and attach the snap connector to the battery pack.
STEP 3
Screw your 12V lightbulb into your lamp of choice and plug in the lamp. Hide your outlet and battery pack by placing them inside the lamp base (if there’s room), mounting them under the table with command strips, or placing them in a decorative basket. I opted for the decorative basket:
And that’s how to make a battery-powered outlet! Now you have the option to move your lamp anywhere in the room without worrying about where to plug it in.
OPTION FOR MAKING A CORDLESS LAMP INSTEAD
It is possible to connect the snap connector and directly to your lamp cord with twist wire connectors if you want a “cordless” lamp instead. (You’ll need to use wire strippers to remove a bit of insulation from the lamp wires). We did not do this because we did not want to cut the lamp wire and we did not have a location to hide the battery pack inside of the lamp base.
A FEW ADDITIONAL NOTES
- If your lamp does not turn on, make sure the snap connector wires are properly attached to the outlet receptacle (Step 2). This is a slightly tricky step because the wires on the snap connector are so small. You do not want to over-tighten them and break them, but you want the connection to be secure.
- I finally tested the run time of the lamp on the battery pack. Check out that post here. The 3 watt bulb that I recommend ran for over 10 hours when we tested it. The LED bulb is low-voltage so it doesn’t draw too much power. However, batteries do not last forever. To save money, I recommend purchasing rechargeable AA batteries (or two sets of eight if you always want to have one set in use).
- The 12V 3 watt bulb puts out a decently bright light. I can read a magazine near the light if the room is dark. I would say it is comparable to a 30-40 watt light bulb. If you want a brighter light, though, you may want to try out a 6 watt bulb (Amazon link here) or higher. See my post on Revisiting the DIY Battery Powered Table Lamp for more information.


I’m confused on where the wires go in the outlet?!?! Do the go just underneath the screw? In the hole underneath the screw?!??
Good question! I can see it’s not completely clear in the photo. We put the wires under the screws because it is a more secure connection (i.e., less likely to be yanked out). You wrap the wire around the screw so it looks like a fishhook and then tighten the screw. Hope this helps!
Howdy! How long are the batteries lasting? I mean we won’t leave the lamps on all the time, so thinking they will be good for a good while.
Hi Chris, to be quite honest, my kids destroyed our battery pack and I haven’t gotten around to replacing it to run a test on usage. I’m so glad you commented because it has been on my to-do list for a long time. I just ordered a new battery pack from Amazon and will run a test this week.
Based on our calculations, though, a 10.6W bulb (which is pretty bright) should last between 2 – 2.5 hours of full-time usage. The 10.6W bulb draws an average current of approximately 900mA. Eight AA batteries in a series provides approximately 2000mA hours at 12V. 2000mAh/900mA = 2.22 battery life hours.
With that said, there are lower wattage bulb options out there that would last longer. As an example, a 7W bulb should last around 4 hours. However, this might sacrifice brightness. I’ve ordered a 7W bulb and a 3W bulb so I can test all of the options. I’ll update the post as soon as I have more information. Thanks again for your comment!
Would this hack work to use on a couch that has to plug in for electrical powered recliners?
Hi Cari, unfortunately it won’t work for that use. The powered recliner requires a lot more power than the battery pack can provide. This hack just works with a low voltage LED lightbulb in a lamp.
Hi, I was wondering if this would work for a string of Christmas tree lights as well?
Hi Ian, this only works for low voltage DC electronics like the 12V lamp. Unless the Christmas lights operate at 12V, the battery powered plug receptacle won’t work.
I went ahead and put all this together step by step but the outlet doesnt seem to work with anything 🙁
Hi! So sorry you are having issues with the plug receptacle. Because it is battery powered, the plug receptacle only works with low-voltage electronics like the lamp with the 12V bulb. Unless your Christmas lights operate at 12V as opposed to the usual 120V, this probably won’t work.