
I have a quick DIY that I’m excited to share with you today. To continue the purple theme, The Dot and I made this cute purple glitter light switch cover to go in her newly decorated room.
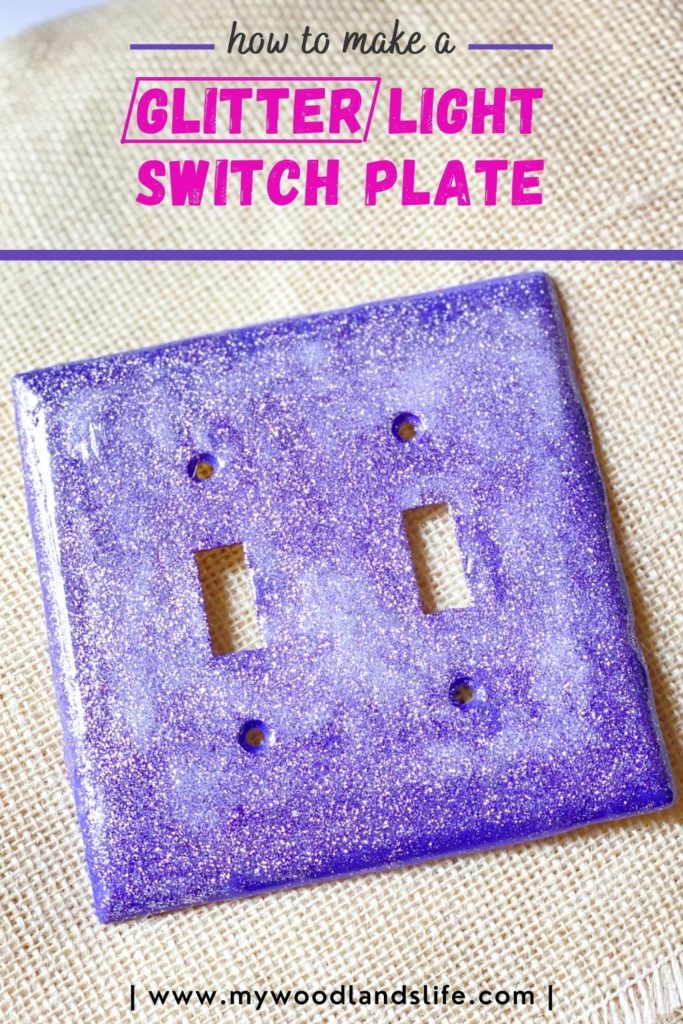
The entire project took less than ten minutes (not including drying time) and cost under $10 to make. We made ours purple of course, but it’s easy to customize. A zebra or rainbow pattern would be super cute as well.
Supplies:
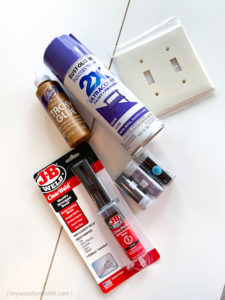
- Light switch cover plate – You can purchase double switch covers at Walmart for less than $2.
- Spray paint in base color – We used Rust-oleum Painter’s Touch in “Grape” but any acrylic paint would work.
- Tacky glue – We used this brand (Amazon link) because it’s what I had on hand, but I think Elmer’s would work too. You just want something that will dry clear and hold a good amount of glitter.
- Paintbrush
- Glitter – I have a Martha Stewart glitter set that we use for crafting, but any glitter would work. This set on Amazon looks very similar if you want a lot of colors. Otherwise, Walmart and craft stores sell individual colors for around $2 each.
- Epoxy – I used one package of the J-B Weld ClearWeld Quick Setting Epoxy. I paid under $4 for a package at Walmart, but Amazon sells it too (link here).
- Paper cup
- Disposable spreading stick – a popsicle stick would be a good option here. I used a disposable knife because that’s what I had.
- Toothpicks
- Utility knife (box cutter)
Instructions:
NOTE: Kids can help with the glitter and glue part, but I’d leave the spray paint and epoxy to the adults.
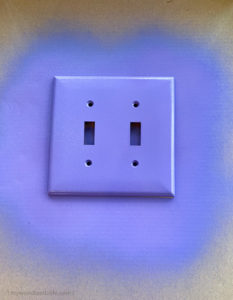
Step 1: Coat your light switch cover with the spray paint base color. Wait for it to dry.
Step 2: Use a paintbrush to cover the now-colored light switch plate with glue.
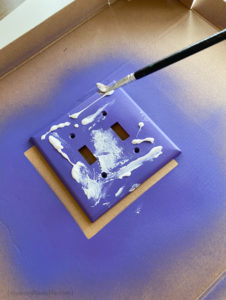
Step 3: Sprinkle a heavy coat of glitter on top of the glue. Let it dry for about ten minutes, and then tap off the excess glitter.
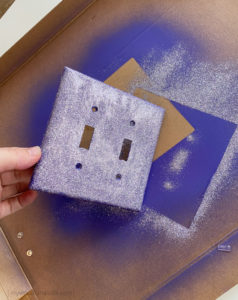
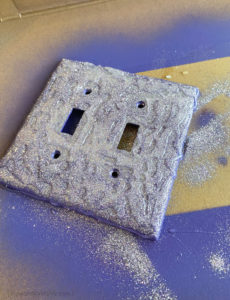
Let the glue dry completely.
Step 4: After the glue is dry, follow the instructions on the back of the epoxy container for mixing the epoxy. The J-B Weld brand epoxy I used has an “E-Z Mixer” that does the job for you. Working fast, spread the epoxy evenly across the entire light switch cover. Don’t forget to cover the sides of the switch plate.
Use a stick or flat tool to fill in any holes in the epoxy.
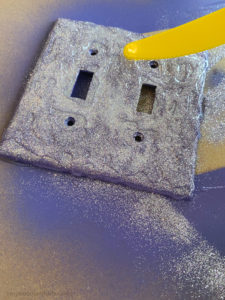
The epoxy on the glitter is very shiny, so it helps to get level with the switch plate to look for holes.
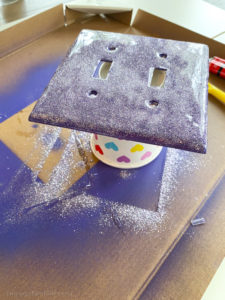
Step 5: Before the epoxy dries, use toothpicks to lift an edge of the switch plate and, holding it from the bottom side, set the plate on top of an upside down disposable cup (or small box). You’ll want to do this so it doesn’t stick to your work station.
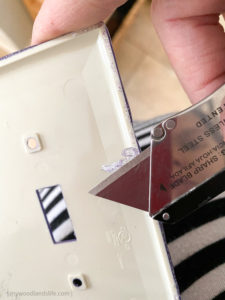
Step 6: Let the epoxy dry for one hour. It will be slightly tacky at this point. Use a utility knife to trim any excess epoxy off of the back of the switch plate so it will eventually sit flush against the wall.
Step 7: I installed the switch plate on the wall at this point, but it takes a while for the epoxy to fully cure because the layer is so thick. If you want to do it the “right” way, let the epoxy fully dry for 24 hours before installing it on the wall.
Here’s the not-so-easy-to-capture photo of the purple glitter switch plate on the wall. I promise it is a lot more exciting in person. The Dot was thrilled with how it turned out.
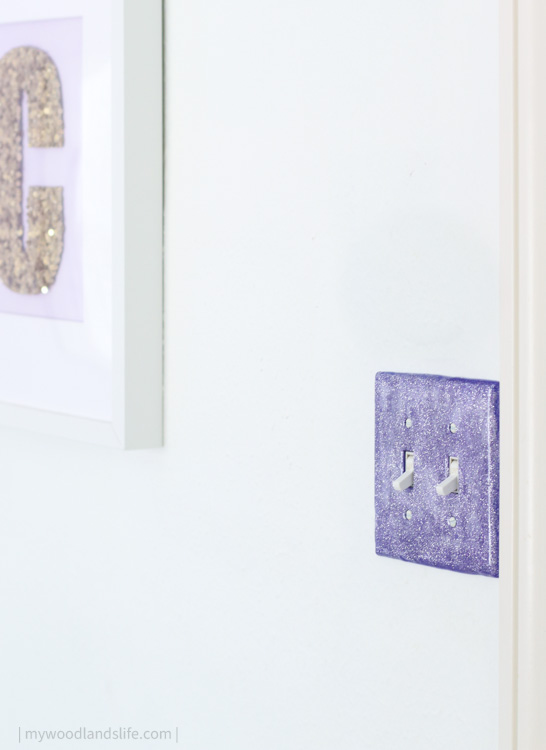
And that’s how you make a DIY glitter custom light switch plate cover!
Keep in mind that, while the epoxy is pretty durable, it can scratch. I wasn’t too worried about this because the bedroom light switch covers don’t get much wear and tear in our house. I used a similar approach to protect Lamborghini’s doc band helmet that I painted when he was a baby, and the epoxy held up great! We called it his “crash helmet.”
On that note, I will leave you with this:

Have a great rest of the week and weekend!


Leave a Reply