
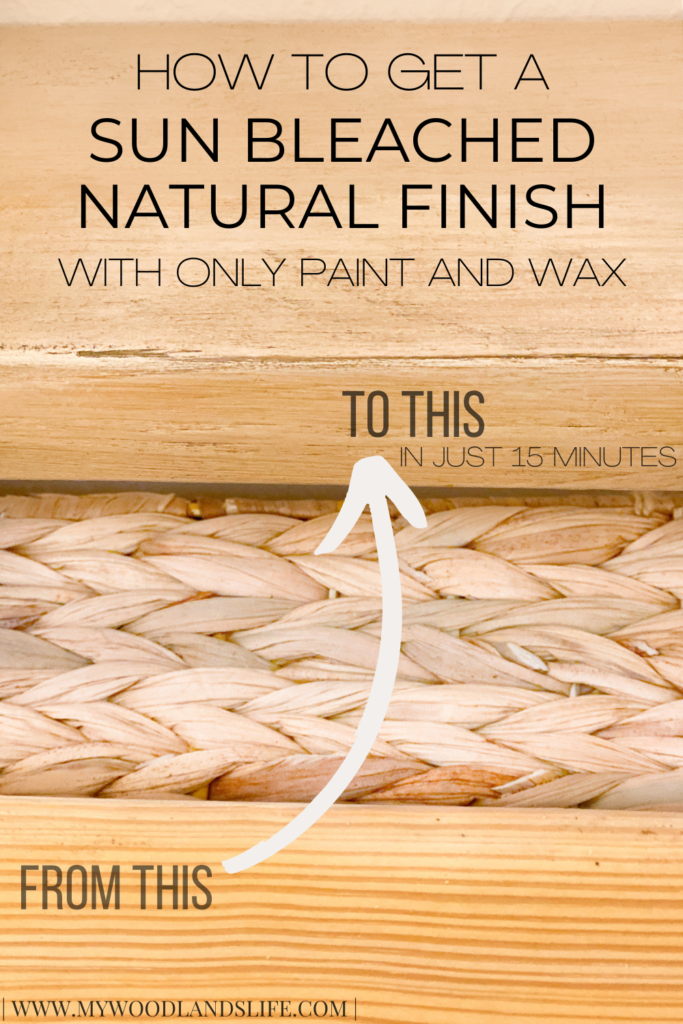
Good morning! I hope everyone had an enjoyable and relaxing weekend. Due to the cold weather, we didn’t get out much this weekend. But the upside to bad weather is that I have time to write blog posts. I had a breakthrough a few weeks ago that I wanted to share with you. I am happy to report that after 10+ years of mixing stains and trying to achieve a French oak and natural oak finish using inexpensive pine wood, I have finally figured it out! And it doesn’t involve bleach. The secret to my success: DIY custom tinted wood wax over a dry brush taupe base. The method is actually a lot easier than staining and dries a lot quicker (and smoother). I’ve set out a step by step process of how I did it below.
The “formula”
The funny thing is I didn’t even use conventional paints for the dry brush and tinted wood wax technique. I used my acrylic painting set that I’ve had for years. I’ve listed the exact products I used below, but I’m sure other acrylic paints in similar colors would work. If you have a larger project, you might want to try a pint or quart sized acrylic paint in a color similar to the paints I used.
Supplies
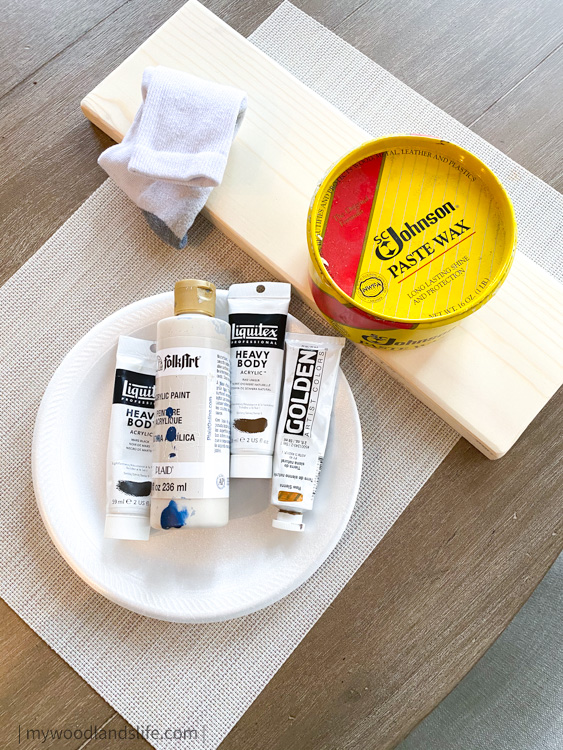
- Wood of choice
- 220-grit sandpaper
- Orbital sander (optional – we have this one)
- Johnson paste wax (Amazon link here but can find at hardware stores for around $7)
- Folk Art acrylic paint in Linen (Amazon link here)
- Liquitex acrylic paint in Raw Umber (Amazon link here)
- Golden brand acrylic paint in Raw Sienna (Amazon link here)
- Liquitex acrylic paint in Mars Black (Amazon link here)
- Old, clean sock
- Styrofoam plate
- Tool for mixing the paint and wax (popsicle stick, disposable knife, putty knife, etc.)
- Gloves
Step 1 – Select and Prepare Your Wood
I did this wood coloring technique on two separate projects–a shelf for our powder room and a wall hook rack for our master bath–and I like how it turned out on the first project so much more.
That’s because the stud grade 2×4 pine wood I used for the bathroom had a few more imperfections than the lighter 1×6 whitewood we purchased from the more expensive wood section at Home Depot. I used scrap wood from our garage, so I didn’t really have much choice. But if you’re starting fresh, I recommend getting some pine wood with character. This technique would also work for refinishing furniture.
Note: In the photos for this tutorial, I am using the whitewood because I had already completed the powder room shelf project with the pine wood. The first photo shows the before and after with the pine stud. It’s hard to tell from the photo, but this technique really gets rid of the orange hue and streaks.
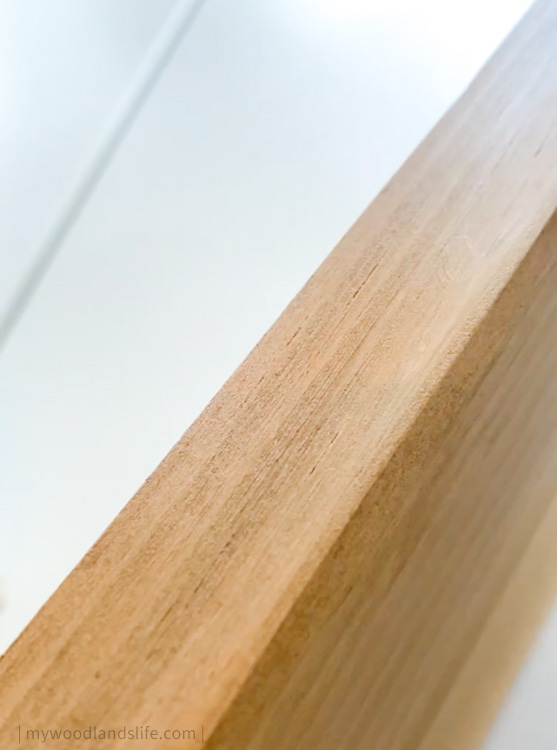
You’ll want to sand your wood to make it smooth. I honestly just went straight to the 220-grit and sanded the wood lightly with that.
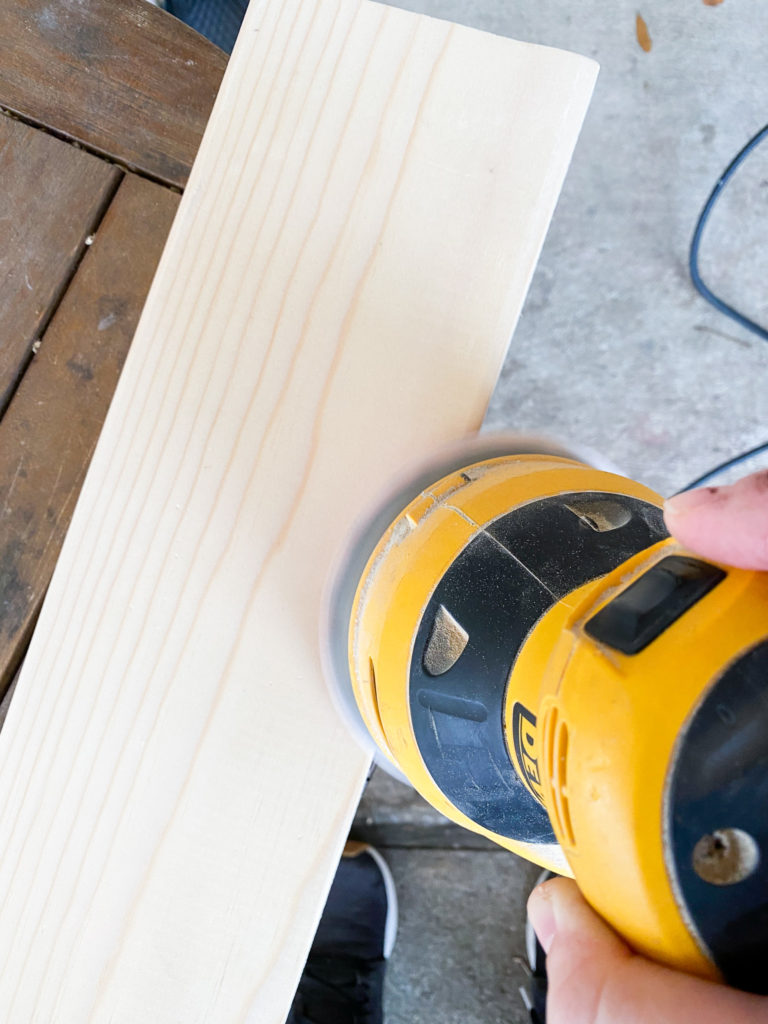
The wood was ready when I could rub my hand across it without getting a splinter. I also sanded down the edges and corners that would be facing out so they weren’t too sharp.
Step 2: Dry “Brush” Your Paint on the Wood
Grab a styrofoam plate and put a nice puddle of the beige acrylic paint on it. Take your sock and dip it in the paint. Then rub it on the wood you want to color. You want to apply a thin coat on the wood so that you can still see the wood grain underneath. The main goal is to even out the base color of the pine wood to get rid of the orange and yellow tint.
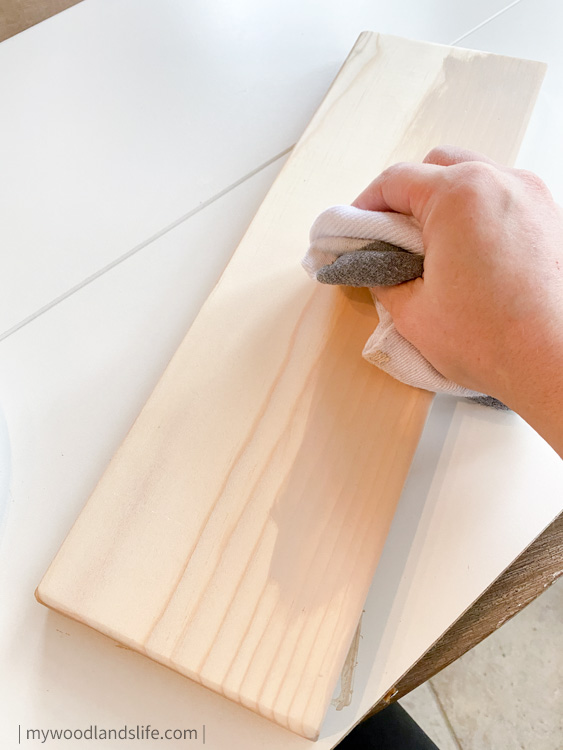
The acrylic paint I used was viscous, but I recommend adding a bit of water to the paint if it goes on too matte. And you can always correct any over-application issues by wiping the paint away with a wet rag before it dries.
After the first application, you may need to add extra paint to certain areas of the wood to even out the color. It should look like this at the end:
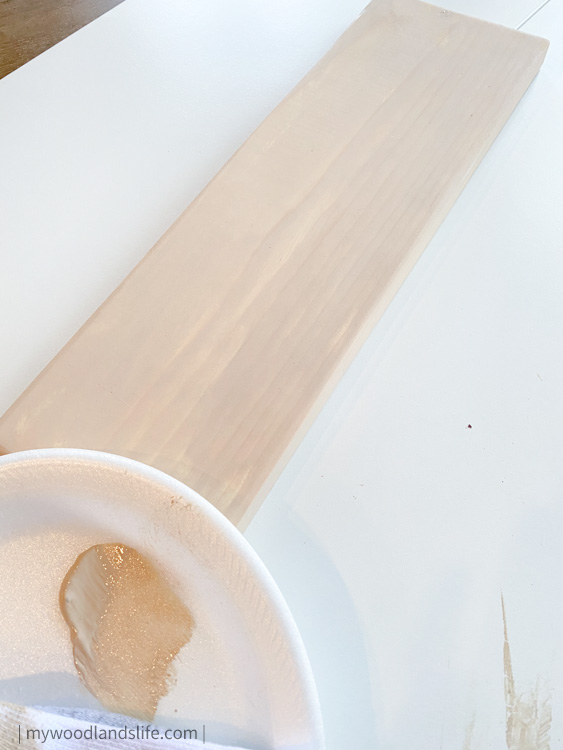
I let the paint dry to the touch before moving onto the next step (around five minutes).
Step 3: Tinting and Applying the First Wax Coat
This is the fun part where you see the transformation take place. Mix a bit of your raw umber colored paint into your raw sienna paint to achieve a mid-brown color:
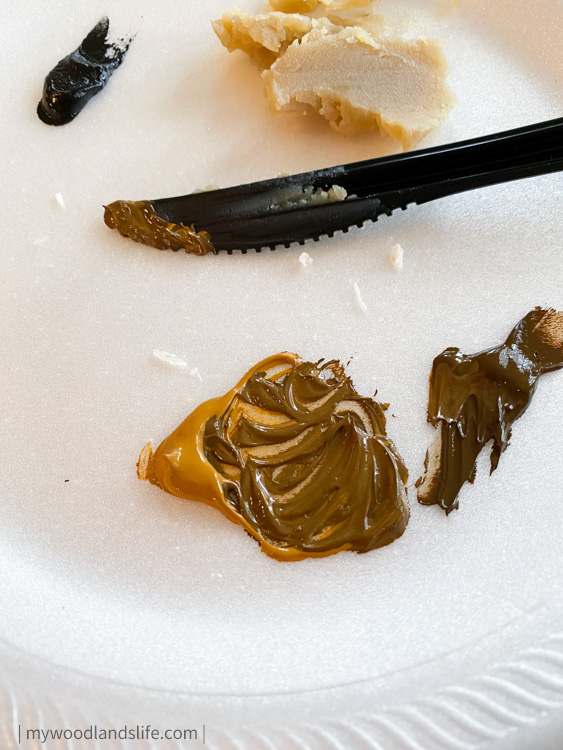
Then take your mixing tool and add a good dollop of wax to the paint (about a 50/50 ratio). Use the mixing tool to distribute the wax into the paint. Note that it doesn’t have to be perfectly mixed at this point because the sock application method works the paint into the wax.
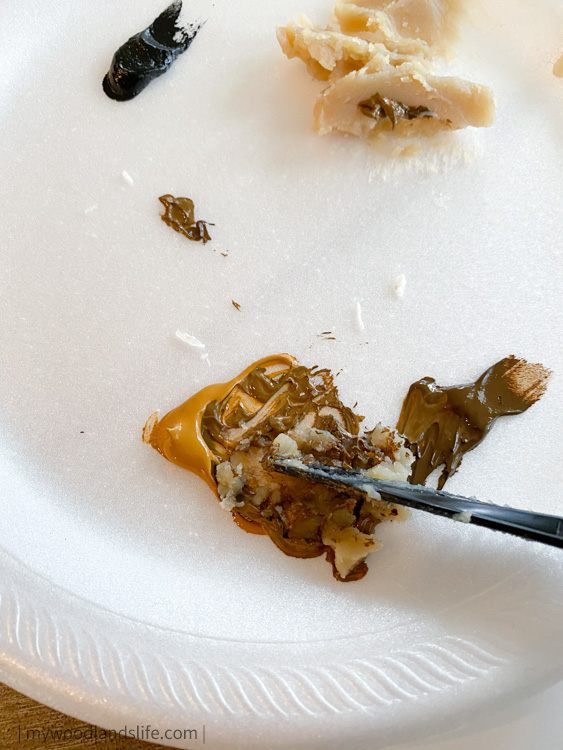
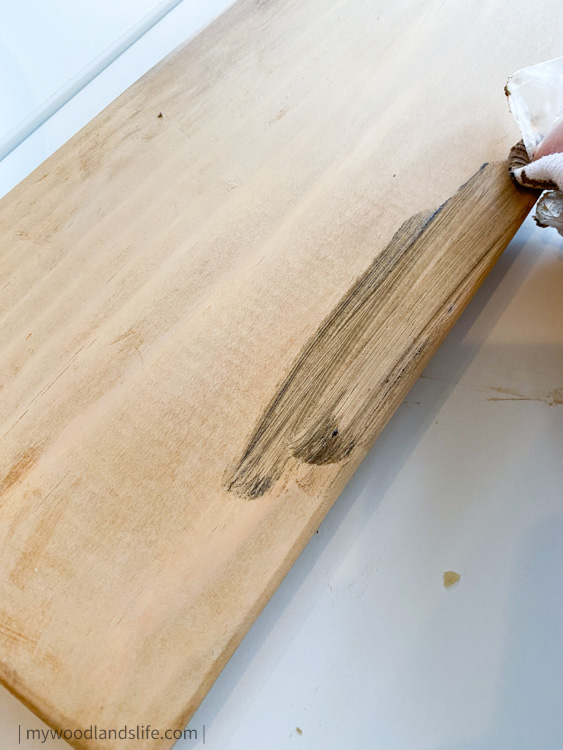
Dip your sock into the tinted wood wax mixture to pick up a dime size amount of wax. Then rub the tinted wood wax onto your wood. A thin layer of wax will actually go onto the board, and you’ll want to keep rubbing it and “working” the wax to blend and distribute the color evenly and to remove the excess wax.

See how it looks streaky at first?
Think The Karate Kid: “Wax on, wax off.” Keep on rubbing the board with the sock to even out the color (see the bottom section of the wood in the above photo).
You can also use a clean section of the sock to remove any noticeable streaks of color. Or add more taupe paint to start back at the baseline if you need a do-over. When you are happy with the tint distribution, move on to the next step. No need to wait for the wax to dry.
Step 4: Tinting and Applying the Second Wax Coat
Next, take your tinted wood wax and mix it with a bit of the mars black paint. You’ll want the wax to make up the majority of this mixture:
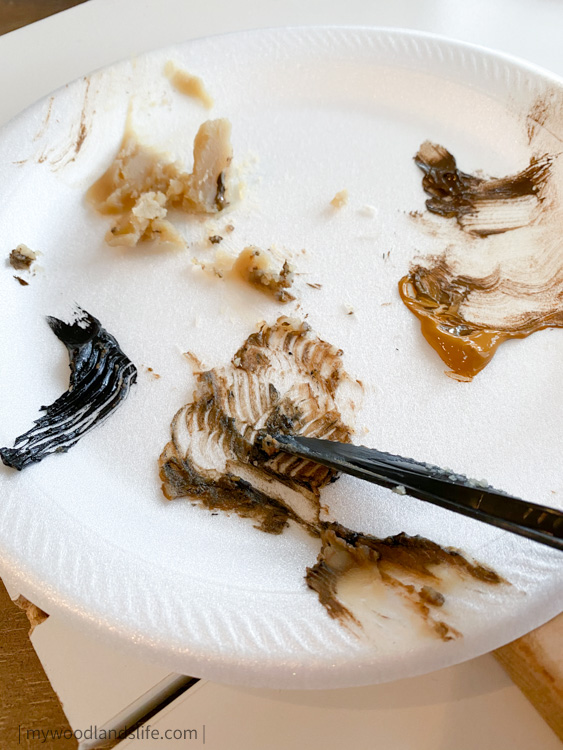
Apply it to your board and keep buffing to distribute the color where you want it. Wax on, wax off.
You’ll notice that the darker wax will start to fill in the nooks and crannies on the wood to give it an aged/antiqued look. You can also use the black wax to tint the entire piece darker if you feel it is too light.
Here is my final piece after about three light applications of the dark tinted wood wax over one application of the lighter, brown wax:
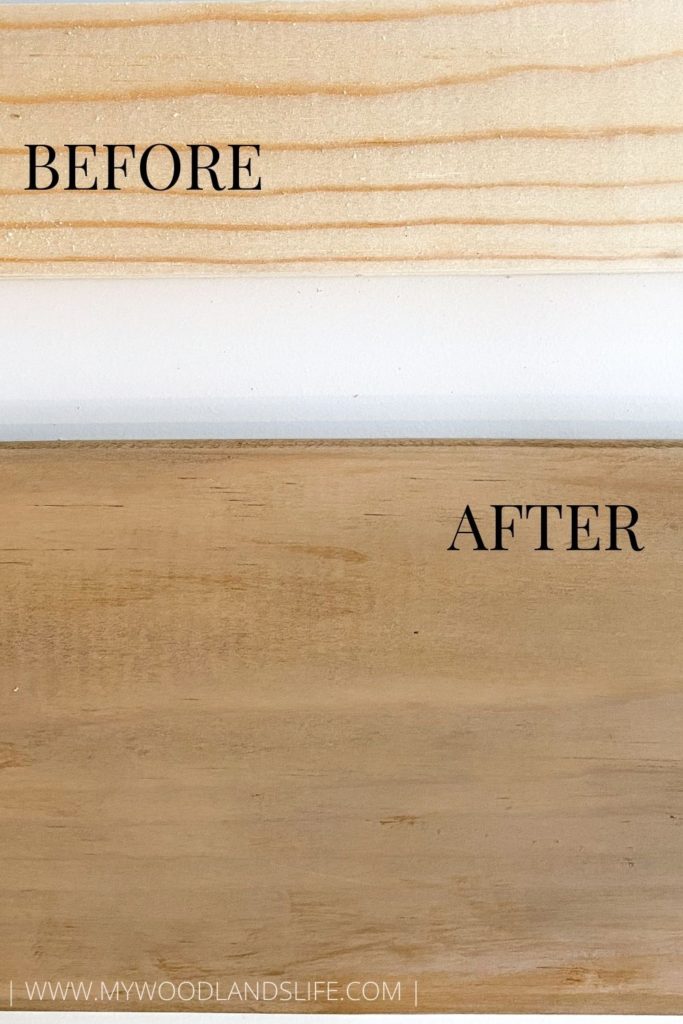
This is the before and after for the whitewood board. The original board was a 1×8 that I cut down to a 1×6. So the “before” wood is literally the same wood as the “after.” Huge difference, yes? The yellow pine stud before and after is in the first photo at the beginning of this post. I used the same supplies and technique for both.
Step 4: Drying Time
When I achieved the look I wanted, I let the tinted wood wax dry on the wood completely for 24 hours before installing the projects on the walls. The pieces I made won’t get much wear and tear, so I didn’t add any more wax. But if you are worried about scratching, you could add extra clear coats of wax to protect the wood.
Wax actually dries pretty hard. It’s not as robust as polyurethane, but a lot of furniture-makers use it to protect wood projects.
As an aside, do not attempt to put polyurethane over a wax coat. I have been there and done that, and the polyurethane will not stick.
Step 5: Admire Your Work
I absolutely love how my two pieces turned out. Here’s a photo of the shelf installed in the powder room:
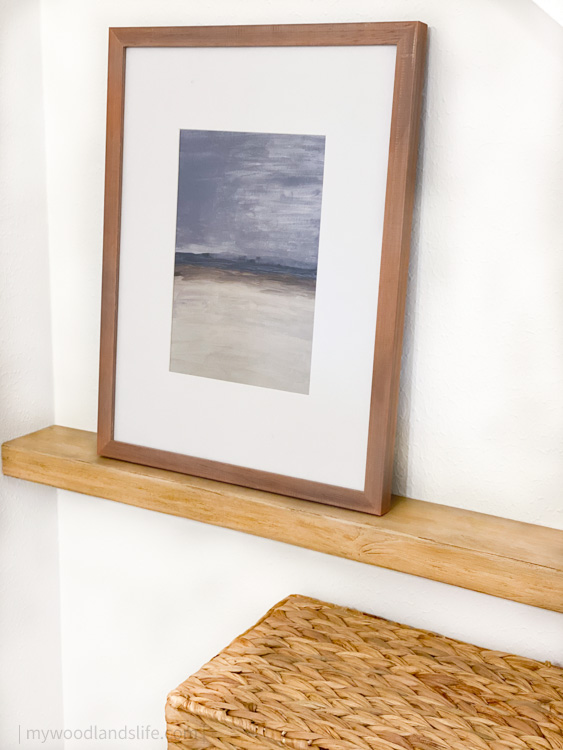
To make the floating shelf, we just cut the 2×4 to the length we needed and used our kreg jig and kreg screws to attach it to the wall studs on the underside. Let me know in the comments if you would like more information on how we made the shelf.
The wax adds a nice buttery texture to the wood. Plus I feel like the paint and wax application process is a lot faster and less messy than staining wood. This DIY wax tinting method also costs a whole lot less than purchasing tinted wood wax from the hardware store.
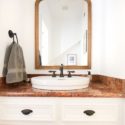
I also liked that I could customize the wax to get the color I wanted. My inspiration for the wood color was this French Country wall mirror I purchased at Target for our powder room (more on that room makeover later), and I think I got pretty close to matching the wood. But possibilities are endless depending on the color you want to achieve.
So far, we’ve had the shelf and wall hook rack up for a month, and the wood looks as good as it did when I finished the final wax application. I’ll update this post if I notice any issues, but I have a feeling these pieces are here to stay.


Interesting article!
Thank you Rea!
Wow, what a difference that treatment makes to the wood! Interesting DIY project…
Thanks Jenny! I appreciate you checking out the post!
Right on! Staining is a pain, for sure. But this work-around is something I can definitely do!
Thanks Patricia! Yes, I was so happy to find an easy alternative to staining with quick results.
wow, that was really interesting to read. I am not doing any DIY projects at the moment but it was useful to read about various techniques. Who knew you can paint using a sock?! Love the end result.
Thank you Inga!
O wow! I love this! 🍀
Thank you Marianne!
Wow, love this! I’ll share with my husband since he does woodworking! (Is it weird that the paint prepping picture made me hungry? LOL)
Thanks so much for checking out the post! The paint does sort of look like chocolate. Lol!