My Woodlands Life

  • Home
  • About
  • PROJECTS
  • FOOD
  • FAMILY
  • DECOR
  • GARDEN
  • Contact

Blog DECOR PROJECTS

My Experience with Peel and Stick Wallpaper + Tips and Tricks

Entryway table with blue and white vase decor and chevron green peel and stick wallpaper

Well I did it! After living with white walls for a little over a year, I decided to add some color back into our lives. Actually a lot of color. Bright green herringbone wallpaper to be more precise. To achieve this I used the temporary hair dye of the design world: inexpensive peel and stick wallpaper from Amazon. It’s a fun way to spruce up your home without making a long-term commitment. This was my first time installing wallpaper, and overall I had a positive experience. I wanted to share what I learned along the way in case anyone else wants to foray with peel and stick wallpaper and go bold.

But first the “before”:

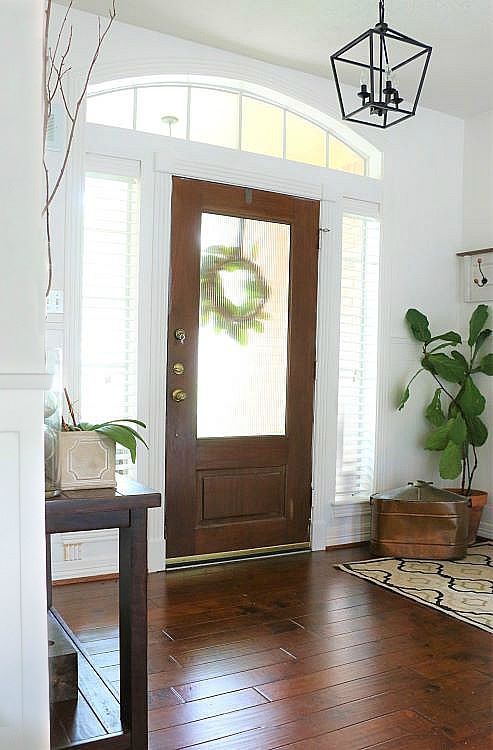
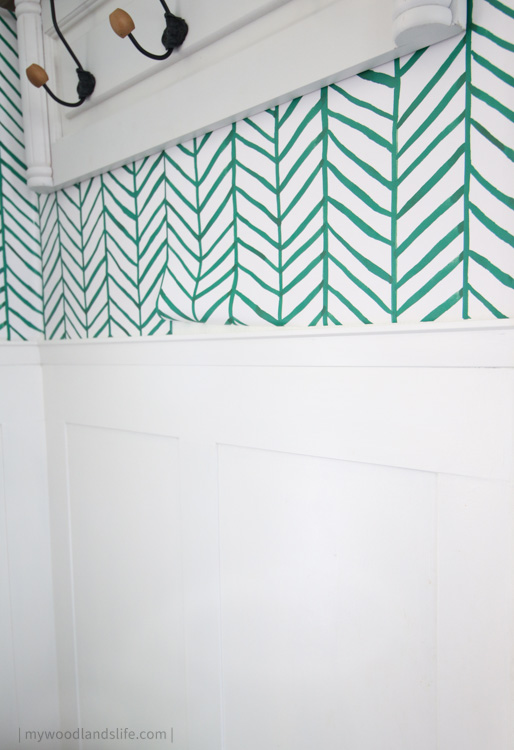
Remember when I painted the entire downstairs white? I still love the crisp, clean look of white walls but I needed a pop of color.
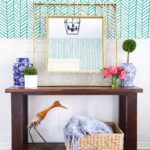
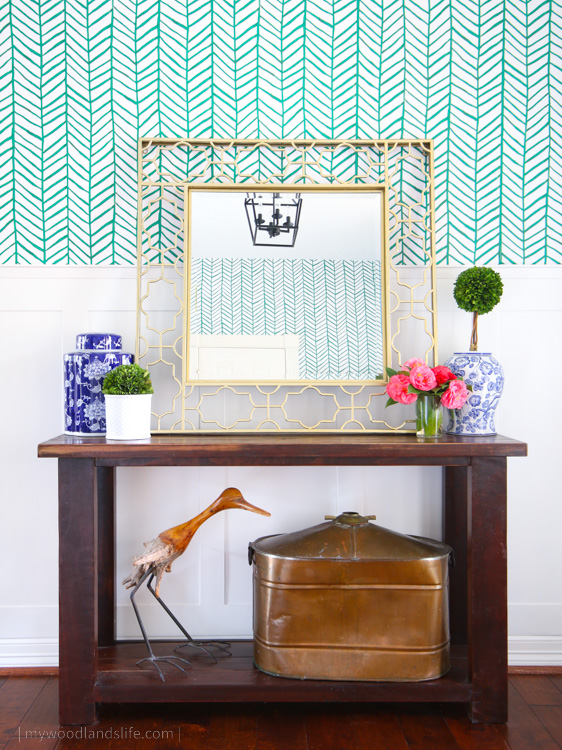
And pop it does!

Entryway with peel and stick green chevron wallpaper and board and batten

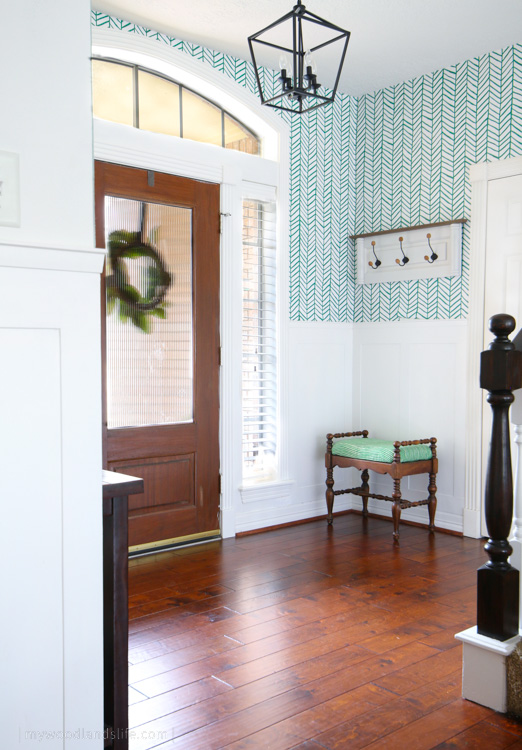
The bright green and chevron pattern is so cheery and brings a smile to my face every time I pass by. I couldn’t be happier with how it turned out.

Wallpaper Inspiration

Truth be told, I have had wallpaper on the brain for a couple of years now. One of my favorite Instagram accounts is Blakely Interior Design. The mantra of the company is to “live vibrantly,” and the company’s designs live up to that aesthetic. They are bright and colorful. A lot of neutrals mixed with bold pinks, greens and blues. Several months ago, they posted an entryway table with a fun green wallpaper by Quadrille Fabrics (see the completed project on Blakely Interior Design’s website here). I immediately fell in love. I knew I wanted to wallpaper a little bit of our house, but I had to wait for the wallpaper stars to align with my DIY budget.

Wallpaper Reality

I don’t know if you’ve looked into wallpaper recently, but it’s not like the 80s and 90s. All of the good stuff is $100 – $500 (and up) per roll. And that doesn’t include install cost (because if you are spending $1000+ on wallpaper for a room you want to hire someone who can do it right). Definitely out of reach for me.

Amazon and other big box stores have us covered, though. As an alternative to the swoon-worthy wallpaper for the Architectural Digest crowd, peel and stick wallpaper has come a long way in style and price. I will admit that at first I was dubious about ordering cheap wallpaper from Amazon, but after perusing patterns and reviews online I decided to pull the trigger.

My peel and stick wallpaper

I ended up purchasing this green peel and stick wallpaper (Amazon link):

My wallpaper arrived in a bundle of pretty little rolls–admittedly not unlike the shelf liners you also find at big box stores.

Rolls of chevron green wallpaper in box

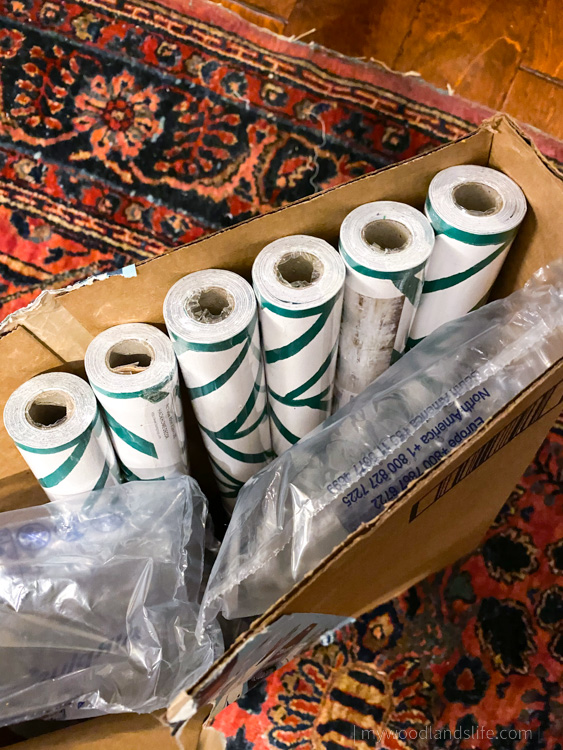
But when I put it up on the wall, I was really happy with the results.

The Pros –

I loved that I could unpeel the wallpaper from the wall if I didn’t get it lined up correctly on the first try. I also love that the material is vinyl and wipeable and less likely to stain than traditional paper wallpaper. The best part was that I completed the entire install by myself in one night. This particular peel and stick wallpaper is a good pattern for beginners because it is easy to match up the vertical lines.

Entryway table with blue and white vase decor and chevron green peel and stick wallpaper

And the price! I ordered two extra rolls and ended up returning the one roll that I didn’t use (mistakes do happen). The total cost of my project was under $100, which is expensive compared to paint but a lot less expensive than the real stuff would have been.

The Cons –

As cute as it looks, the peel and stick wallpaper is not without its faults. There are a few areas on the wall in which the wallpaper is rolling up from the bottom.

Peel and stick wallpaper rolling up on bottom

This could be the result of me not cleaning the wall well enough before installing the wallpaper. Because I overlapped the wallpaper when I installed it, I went ahead and super-glued the offending piece on top of the piece next to it without having to glue the paper to the wall. So far it has held up pretty well.

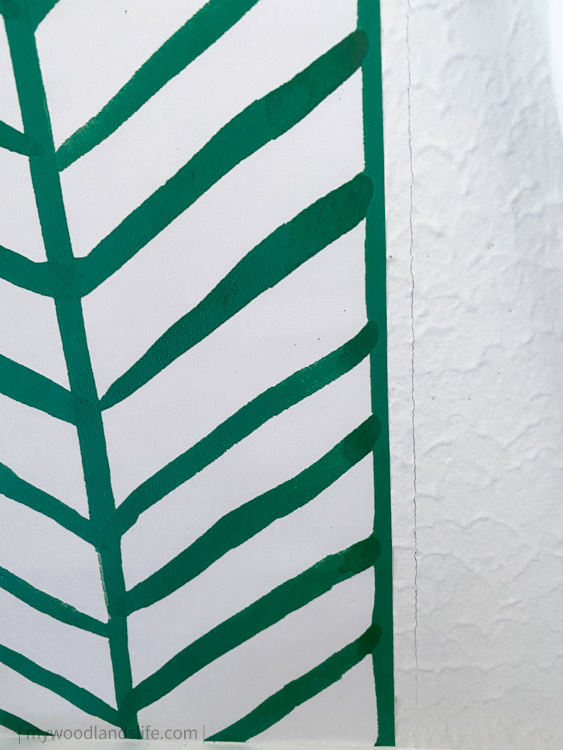
The other negative is that the peel and stick wallpaper is fairly thin and tears easily. The install proved to be tricky in the corners because the wallpaper would tear when I pressed on it if I didn’t fit it into the corner snugly. However, I went over some of the more obvious tears with a green sharpie and can’t see the imperfections at all.

Installation Tips

If you want to take the peel and stick wallpaper plunge, I have set forth my approach to applying the wallpaper below along with a few tips and tricks I learned along the way. Keep in mind, however, that I am not a professional wallpaper installer and this was my first time installing peel and stick wallpaper. But I wanted to share what worked for me because the final result turned out great.

TOOLS

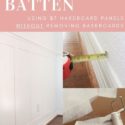
I used my favorite rotary cutting mat (Amazon link here to similar mat), an acrylic cutting ruler (Amazon link here), a utility knife, a level, a pencil, scissors, and a ladder. I was only installing the paper on the top half of the wall because I had previously installed board and batten on the bottom half. Accordingly, I measured the distance between the ceiling and the top of the board and batten and added four inches to the wallpaper for play.

Tools needed for applying peel and stick wallpaper

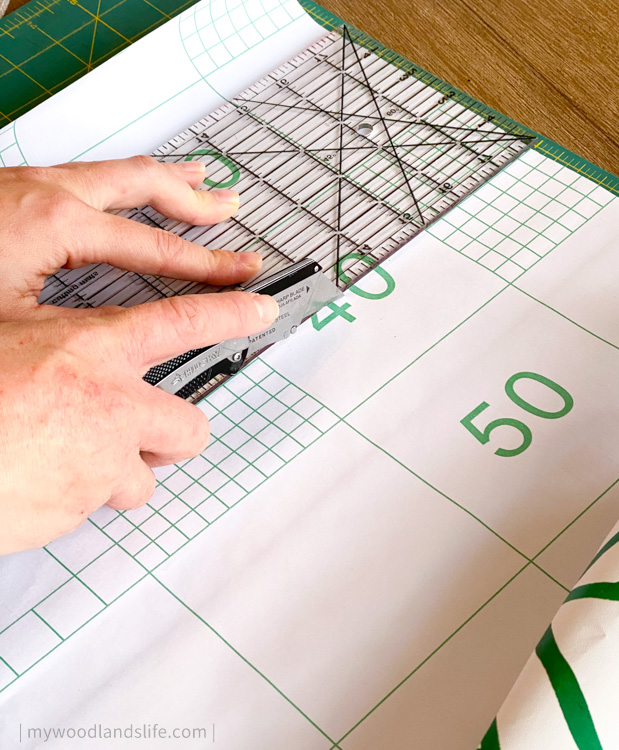
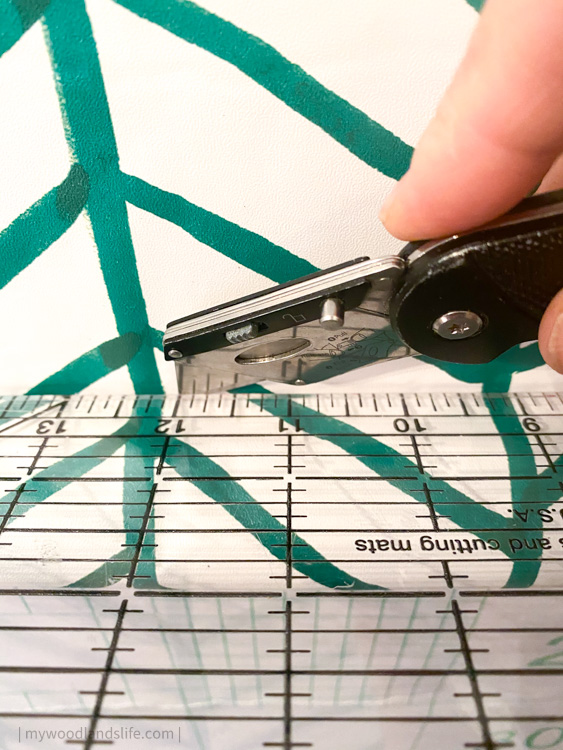
Luckily this wallpaper has lines on the back so you can get a straight cut. I flipped the wallpaper upside down on my mat and slid it along in 20 in increments until I got the length I needed. I then used the utility knife to cut it along the edge of the acrylic ruler. The clear ruler is also really helpful to make sure your cut is straight if you aren’t cutting along the preprinted lines.

APPLYING THE FIRST PIECE

I took a left-to-right approach and started at the left-most corner of the room. For the placement of the first sheet, you want to make sure the vertical line down the wall is straight. I used the level and pencil and drew a vertical line slightly right of where the wallpaper would end. Then I used that line as a guide to make sure the wallpaper was straight on the wall. After that, installation of the next pieces go a lot faster because the pattern of the wallpaper allows the other pieces to line up along that first vertical line.

How to apply the first sheet of peel and stick wallpaper by drawing a line on the wall with a level

It’s good to check with a level as you proceed, though, to make sure you aren’t too off. Mine wasn’t completely perfect, but it turned out ok in the end.

APPLYING THE PEEL AND STICK WALLPAPER SHEETS

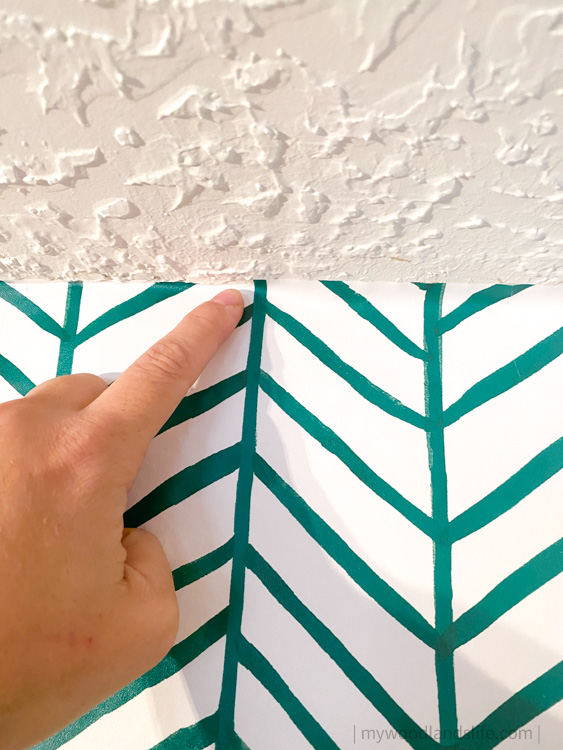
I applied the first sheet of wallpaper by peeling back about 5 inches of the backing along the entire width. Then I lined that up with the ceiling and my penciled vertical line. I pressed the five-inch length onto the wall by hand and then slowly unrolled the rest of the backing, gently pressing the wallpaper against the wall and smoothing out any air pockets.

For the subsequent sheets, simply match up the chevron pattern and the vertical line at the ceiling and repeat the above application process (smoothing it out by hand).

Matching peel and stick chevron wallpaper at ceiling

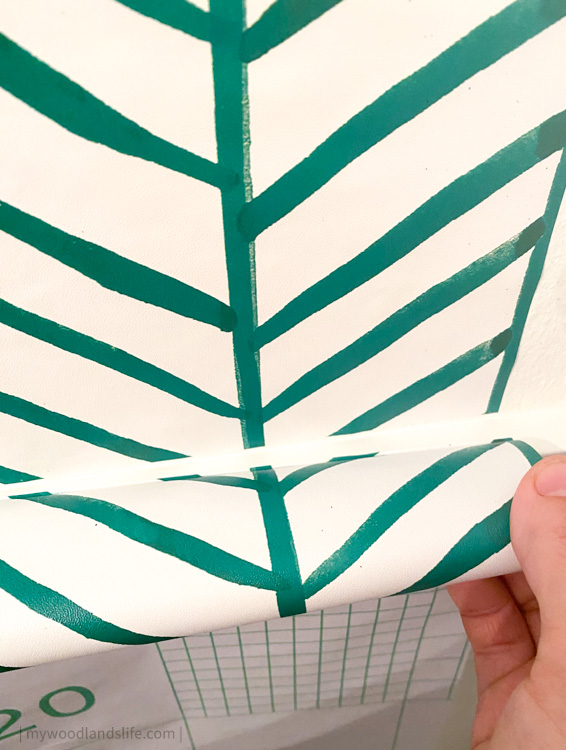
Don’t worry if there is a lot of excess paper at the ceiling line and base line because you can trim that later using the utility knife and a straight-edge. I used my acrylic rule as a straight edge, but a putty trowel/knife would work too.

  • How to trim peel and stick wallpaper at base of wall after installing with utility knife
  • How to trim peel and stick wallpaper at base of wall after installing with utility knife
PRESSING THE WALLPAPER ONTO THE WALL

After reading several reviews, I did not use a tool to press the wallpaper onto the wall. I used my hand to smooth it out and did not have any issues with the wallpaper tearing (other than the corner issue mentioned above).

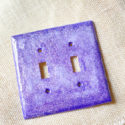
WORKING THE WALLPAPER AROUND RECEPTACLES
  • Chevron green peel and stick wallpaper around light switch receptacle
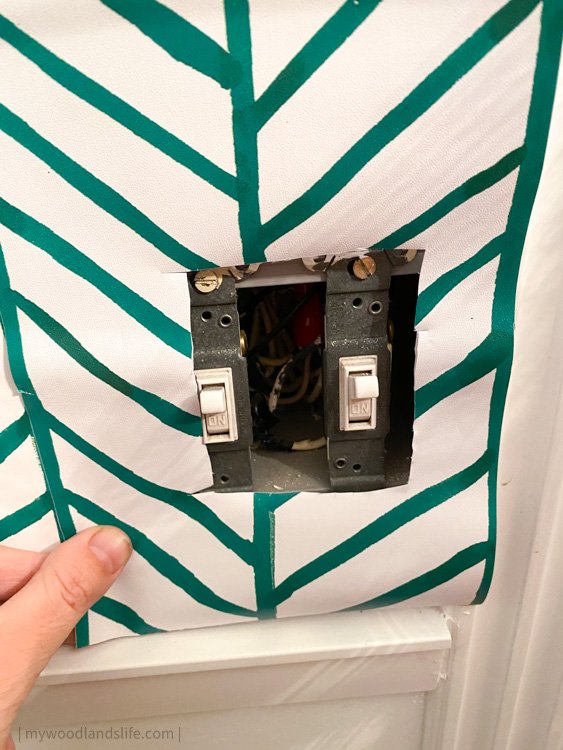
    1. Use utility knife to roughly cut around receptacle
  • Chevron green peel and stick wallpaper around light switch receptacle
    2. Trim excess with scissors
  • Chevron green peel and stick wallpaper around light switch receptacle
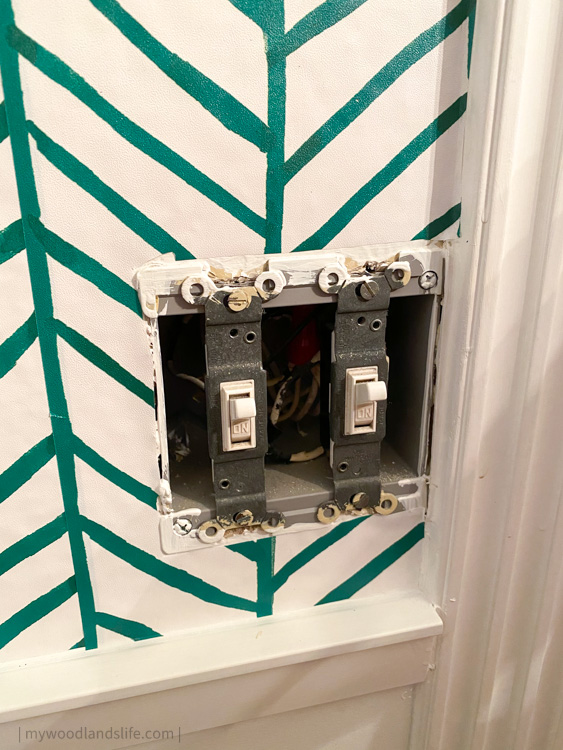
    3. Press back onto wall and trim side with utility knife

I cut around the switch receptacles as I went. I removed the switch plates and proceeded as if nothing was in the way and then used a utility knife to cut around the hole. Then I pulled the wallpaper away from the receptacle and trimmed out the hole with scissors.

NOTE: To do this “cut-as-you-go” approach, it is imperative that you turn off power at the breaker before handling metal tools around the receptacles (light switches or plugs). If you don’t want to do this step, premeasure where the holes will go and cut out the holes away from the receptacles.

APPLYING THE PEEL AND STICK WALLPAPER TO CORNERS
How to apply peel and stick wallpaper to a corner

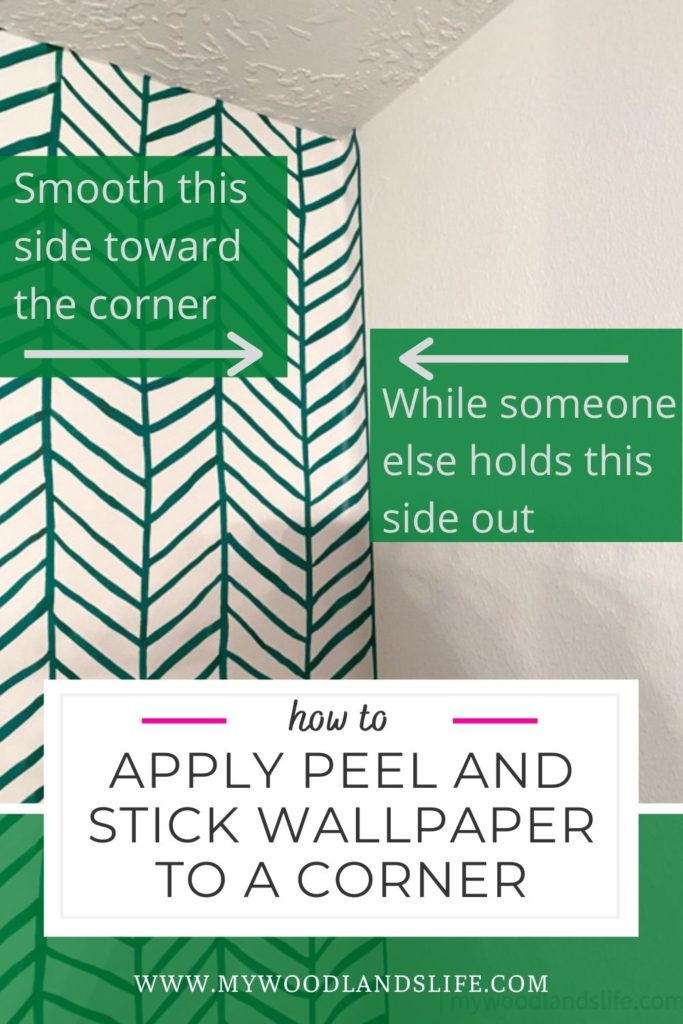
For the corners, work your way toward the corner by smoothing the wallpaper out from left to right until you reach the corner. Ideally, someone would hold the other side of the wallpaper away from the corner while you do this. Then press the left side of the wallpaper into the corner and fit the right side in snugly. As I mentioned, my approach to this was not fool-proof because Mr. L was away on a business trip, and I didn’t have a second set of hands. Looking back, the above approach would have been ideal. If anyone knows of a better way to wallpaper corners, I’d love to know what it is.
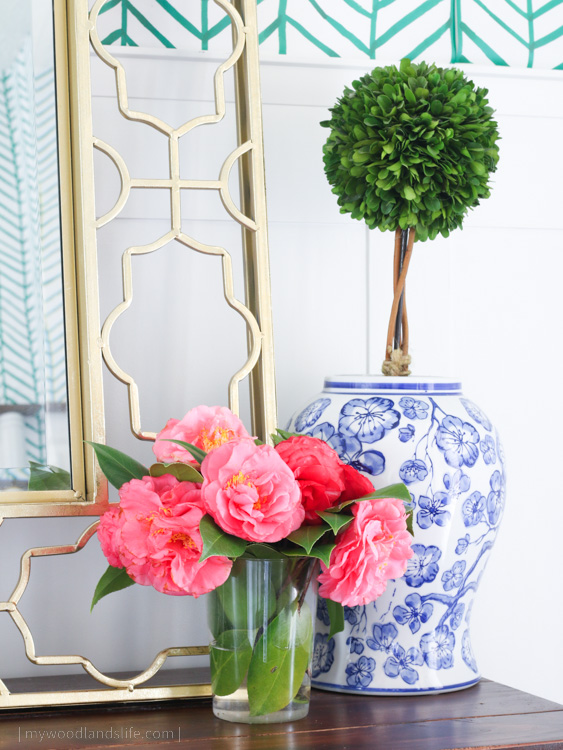
Final Thoughts

So far we’ve had the wallpaper up for about three months and, aside from the peeling in two places, haven’t had any major issues with it. I’m hoping it weathers well because I absolutely love how cheery it makes the entryway feel. It also goes well with my new chinoiserie vases.

Blue and white vase with topiary and camelia flowers and peel and stick wallpaper in green chevron pattern

In any event, even if it doesn’t last, it’s like that temporary hair dye: A good visual confirmation for determining that I may want to save for that particular wallpaper that I love if I ever decide to go permanent.

Sources

Wallpaper (Amazon link here)

Mirror (Hobby Lobby)

Light fixture (Wayfair link here)

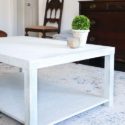
Entryway table (makeover of IKEA Rekarne sofa table using gel stain)

Blue and white vases (Home Goods finds, but I love this one from Amazon)

White pot (Home Goods find)

Wall hook (Kirklands)

Bench (antique)


Leave a Comment

Related Posts

  • Serena and Lily Inspired Coffee Table IKEA Hack
  • DIY glitter light switch cover plate
    DIY Glitter Light Switch Cover Plate
  • Sharing our light and airy living room reveal! See how we transformed our traditional formal living room into a bright modern space using BM Chantilly Lace.
    Light and Airy Living Room Reveal
  • How to install board and batten without removing baseboards

Disclosure:

As an Amazon Associate I earn from qualifying purchases.

Follow me on Social Media

  • Email
  • Facebook
  • Instagram
  • Pinterest

SUBSCRIBE TO MY BLOG VIA EMAIL

* = required field

INSTAGRAM FEED

🌷🐇 Happy Easter!! 🌷🐇 Truth be told, I 🌷🐇 Happy Easter!! 🌷🐇 Truth be told, I didn’t decorate for Easter this year because the house is in shambles and I can’t imagine adding more things to the chaos (new baby and teething toddler are a tricky combination). However, I did manage to put together a small bunnyscape on our kitchen table. Looking forward to Easter brunch with the family tomorrow ❤️🐰

#easterbrunch #easterbreakfast #tablesetting #easter #easterdecor #eastertablescape #eastertable #eastertabledecor #tablescape #tablescapestyling #bunnies #herecomespetercottontail #familytime #springtablescape #springtabledecor #springtable #entertainingathome #neutralstyle #neutraldecor #neutralhome #carrotcake #mywoodlandslifeblog
Happy first day of spring! It’s a doozy here in Happy first day of spring! It’s a doozy here in Texas. Sixty-four degrees and not a cloud in the sky. The kids went to the park, had a “hot dog fire” outside for lunch, and are playing in the backyard this afternoon. I stayed up late last night finishing up a blog post on one of my favorite projects: my Serena and Lily inspired modern coastal coffee table. We took an inexpensive Ikea Lack coffee table and wrapped it in textured vinyl peel and stick wallpaper to get a designer look for less. Check out the link to my blog in my bio for step by step instructions and sources.

#springisintheair #firstdayofspring #blueandwhite #coastaldecor #moderncoastal #mytradhome #ikeahack #ikeahacks #ikealovers #ikeaideas #topiary #coffeetable #coffeetabledecor #coffeetableideas #grasscloth #grassclothwallpaper #removablewallpaper #lightandbright #chinoiserie #chinoiseriechicstyle #blueandwhitedecor #classicdesign #diydecor #diyprojects #mywoodlandslifeblog
Sharing a pop of green from my wallpaper project. Sharing a pop of green from my wallpaper project. Amazingly this was one of the easiest DIY projects I’ve done, and I loved the immediate results. Plus you can’t beat the Amazon price on removable wallpaper. Click the link in my profile for sources. 

#stpatricksday #wallpaper #peelandstickwallpaper #removablewallpaper #myhome #myhomevibe #myhomestyle #mytradhome #greenandwhite #homedecor #diywalldecor #diyprojects #diyhomedecor #wallpaperwednesday #amazonfinds #herringbone #brightasthetic #brightgreen #wallpaperdecor #diy
Follow on Instagram
This error message is only visible to WordPress admins

Error: API requests are being delayed for this account. New posts will not be retrieved.

Log in as an administrator and view the Instagram Feed settings page for more details.

« DIY Glitter Light Switch Cover Plate
Revisiting the DIY Battery Powered Table Lamp »

Leave a Reply Cancel reply

Your email address will not be published. Required fields are marked *

Recipe Rating


About me

Hi! I'm Lauren. Welcome to my blog, where I write about DIY projects, home decor, and decorating on a budget. With 3 kids under the age of 5, my house not always as neat in real life as it looks on the blog, but I find a way to embrace (and organize) the chaos.

Follow My Woodlands Life

  • Email
  • Facebook
  • Instagram
  • Pinterest

SUBSCRIBE TO MY BLOG VIA EMAIL

* = required field

INSTAGRAM FEED

🌷🐇 Happy Easter!! 🌷🐇 Truth be told, I 🌷🐇 Happy Easter!! 🌷🐇 Truth be told, I didn’t decorate for Easter this year because the house is in shambles and I can’t imagine adding more things to the chaos (new baby and teething toddler are a tricky combination). However, I did manage to put together a small bunnyscape on our kitchen table. Looking forward to Easter brunch with the family tomorrow ❤️🐰

#easterbrunch #easterbreakfast #tablesetting #easter #easterdecor #eastertablescape #eastertable #eastertabledecor #tablescape #tablescapestyling #bunnies #herecomespetercottontail #familytime #springtablescape #springtabledecor #springtable #entertainingathome #neutralstyle #neutraldecor #neutralhome #carrotcake #mywoodlandslifeblog
Happy first day of spring! It’s a doozy here in Happy first day of spring! It’s a doozy here in Texas. Sixty-four degrees and not a cloud in the sky. The kids went to the park, had a “hot dog fire” outside for lunch, and are playing in the backyard this afternoon. I stayed up late last night finishing up a blog post on one of my favorite projects: my Serena and Lily inspired modern coastal coffee table. We took an inexpensive Ikea Lack coffee table and wrapped it in textured vinyl peel and stick wallpaper to get a designer look for less. Check out the link to my blog in my bio for step by step instructions and sources.

#springisintheair #firstdayofspring #blueandwhite #coastaldecor #moderncoastal #mytradhome #ikeahack #ikeahacks #ikealovers #ikeaideas #topiary #coffeetable #coffeetabledecor #coffeetableideas #grasscloth #grassclothwallpaper #removablewallpaper #lightandbright #chinoiserie #chinoiseriechicstyle #blueandwhitedecor #classicdesign #diydecor #diyprojects #mywoodlandslifeblog
Sharing a pop of green from my wallpaper project. Sharing a pop of green from my wallpaper project. Amazingly this was one of the easiest DIY projects I’ve done, and I loved the immediate results. Plus you can’t beat the Amazon price on removable wallpaper. Click the link in my profile for sources. 

#stpatricksday #wallpaper #peelandstickwallpaper #removablewallpaper #myhome #myhomevibe #myhomestyle #mytradhome #greenandwhite #homedecor #diywalldecor #diyprojects #diyhomedecor #wallpaperwednesday #amazonfinds #herringbone #brightasthetic #brightgreen #wallpaperdecor #diy
So very excited about St. Patrick’s Day tomorrow So very excited about St. Patrick’s Day tomorrow!! We have a well-stocked supply of green food coloring and drinks. Plus I have a lineup of activities for the kiddos that I think they will enjoy. The kids and I made this St. Patrick’s Day themed snack board a few weeks ago as a test run for the blog, and I couldn’t have been happier with how it turned out. Totally tricked the kids into trying cauliflower (they were not fans). But they ate everything else. Cookies first of course 🍀. 

#stpatricksday #stpattysday #stpatrick #snacks #snackideas #snacktime #snacksforkids #healthysnacks #healthysnackideas #fruitandveggies #charcuterieboard #holdthemeat #shamrock #rainbowfood #partyideas #appetizers #foodart #stpatricksdayfood #stpatricksdaydecor #fruittray #veggietray
Playing a bit of catchup on Instagram this week an Playing a bit of catchup on Instagram this week and realized I never shared how my daughter's purple bedroom turned out. While it pained me to paint over her blush flower wall, her love for purple won me over. She is thrilled with the final result and is so excited to have her big girl room just the way she wants it. All the details are on the blog (just click the link under my profile to go check out the post). #purplebedroom #nomorepink #purplebedding #bedroomdecor #purpledecor #popofpurple #catart #homedecorlove #bedroomrefresh #bedroommakeover #bedroomdesign #kidsroomdecor #kidsroominspo #girlsroom #kidsfurniture #toddlerroom #purpleroom #benjaminmoore #lavendarice #mywoodlandslifeblog
When I made this flower arrangement a few weeks ag When I made this flower arrangement a few weeks ago, little did I know that all of the camelias would freeze. I'm thankful to have this winter storm behind us. We lost power for 12 hours and luckily do not have any damage to our pipes. But I know a lot of people who were without power and water for days. Praying for Texas's speedy recovery and so very grateful for all of the linemen and other field personnel who worked tirelessly to restore power.⁣
⁣
#prayfortexas #staysafe #flowerarrangement #flowerpic #blueandwhite #diyhomedecor #entrywaydecor #camelia #pinkandblue #flowerlove #flowerpop #flowersofinstagram #chinoiserie #gingerjar #chinoiseriechic #palmbeachstyle #readyforspring #springinspo #springinthesouth #touchofpink #springflowers #traditionalhome #mywoodlandslifeblog
Now that 2021 has officially begun, I’m starting Now that 2021 has officially begun, I’m starting off the week with fresh linen. Have downsized decorative pillows to three, which makes the husband happy. Drawback to bedding refresh: getting out of cozy bed every morning is a challenge. 

#whitebedding #whitebedroom #neutralbedroomdecor #newyearnewbedding #dontwanttogetup #mypotterybarn #pickstitch #serenaandlily #percaleduvet #diyeurosham #whiteandbright #bedroomrefresh #beddingdecor #beddinginspo #homedecor #brightbedroom #mywoodlandslifeblog
Just finished putting together our mini holiday ho Just finished putting together our mini holiday home tour on the blog and realized that while Christmas is almost here, it is almost over too. I will miss all of the ornaments and reindeer and excuses to eat Christmas cookies. I’m looking forward to spending the next few days with family and especially with the kids. I’m also looking forward to 2021 and am hoping it brings some peace and resolution to this confusing year. I hope too that everyone has a safe and joyful holiday and a Happy New Year. 

#merrychristmas #happyholidays #christmasishere #enjoythemoment #holidayhomedecor #vibrantchristmas #blueandwhite #flocked #christmaslivingroomdecor #mywoodlandslifeblog
What’s for Christmas dinner? I have no idea, but What’s for Christmas dinner? I have no idea, but we will have a cute table setting 😂. I made these pink, green and red charger plates out of $2 plastic chargers from Hobby Lobby and acrylic paint. Check out today’s blog post for more detailed sources/instructions. I’ve also uploaded a step-by-step to my story highlights. 

#christmastablesetting #christmastabledecor #diychargerplates #diycharger #handpaintedchargerplate #christmaschargerplates #pinkandgreenchristmas #worldmarketlinens #holidaycharger #holidaytable #holidaytablesetting #agapanthus #hollyberries #decoratefortheseason #merryandbright #pinkchristmas #mywoodlandslifeblog
I made these little Santa cookies today to go with I made these little Santa cookies today to go with the trees and couldn’t be happier with how they turned out. Packaging them all up with some #traderjoes chocolate covered pretzels to deliver to the neighbors as Christmas goodies. 

Cookie cutters and design inspiration from @hol_fox 
She has the cutest Etsy account with such clever cookie ideas. 

#christmascookies #royalicingdecoratedcookies #santacookies #neighborgiftideas #diyholidaycookies #cutoutcookies #holidaycookies #sugarcookiesfromscratch #hollyfox #christmasgiftidea
A few years ago, I made these piped Christmas pill A few years ago, I made these piped Christmas pillows for our master bed. Well the husband won the pillow battle, and I will humbly admit that having 11 pillows on the bed is a bit much. I think the pillows look cuter on the couch anyway.

#plaidchristmasdecor #plaidpillows #stewarttartanplaid #diypillowcovers  #howmanypillowsistoomany #neutralholidaydecor #redandgreenandwhite #whitecouch #diychristmaspillows #pipedpillows #livingroomdetails #christmasdetails
Tree confession: Not only does our tree have the p Tree confession: Not only does our tree have the party in the front, naked in the back thing going on, it’s also rocking the high water look. The baby (now toddler) keeps absconding with the lower ornaments. Plus our three and five-year-old wanted to show us how tall they are by putting the ornaments as high as they could reach. So we have some nice ornament clumps at arm’s length 😂. Wouldn’t have it any other way though! 

#christmastreedecorating #christmastrees #silverandgoldchristmastree #neutralchristmasdecor #christmaswithtoddlersismagical #treesofinstagram #christmastrees #christmastreedecoration #homedecor #neutralstyle #stockings #boxwoodwreath #mywoodlandslifeblog
Follow on Instagram
This error message is only visible to WordPress admins

Error: API requests are being delayed for this account. New posts will not be retrieved.

Log in as an administrator and view the Instagram Feed settings page for more details.

Recent Posts

How to Make an Om Nom Birthday Cake

How to Make an Om Nom Birthday Cake

Our Coastal Family Room Before and After

Our Coastal Family Room Before and After

Easter Weekend Recap and an Easter Table Setting

Easter Weekend Recap and an Easter Table Setting

Privacy Policy
Cookie Policy

Copyright © 2025 · Divine theme by Restored 316

This website uses cookies to improve your experience. By using this website, we assume you are ok with this, but you can opt-out if you wish.Accept Read More
Privacy & Cookies Policy

Privacy Overview

This website uses cookies to improve your experience while you navigate through the website. Out of these cookies, the cookies that are categorized as necessary are stored on your browser as they are essential for the working of basic functionalities of the website. We also use third-party cookies that help us analyze and understand how you use this website. These cookies will be stored in your browser only with your consent. You also have the option to opt-out of these cookies. But opting out of some of these cookies may have an effect on your browsing experience.
Necessary
Always Enabled

Necessary cookies are absolutely essential for the website to function properly. This category only includes cookies that ensures basic functionalities and security features of the website. These cookies do not store any personal information.

Non-necessary

Any cookies that may not be particularly necessary for the website to function and is used specifically to collect user personal data via analytics, ads, other embedded contents are termed as non-necessary cookies. It is mandatory to procure user consent prior to running these cookies on your website.