
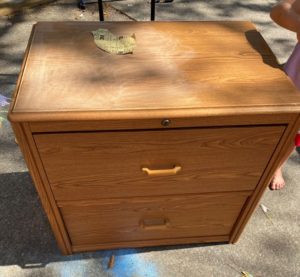
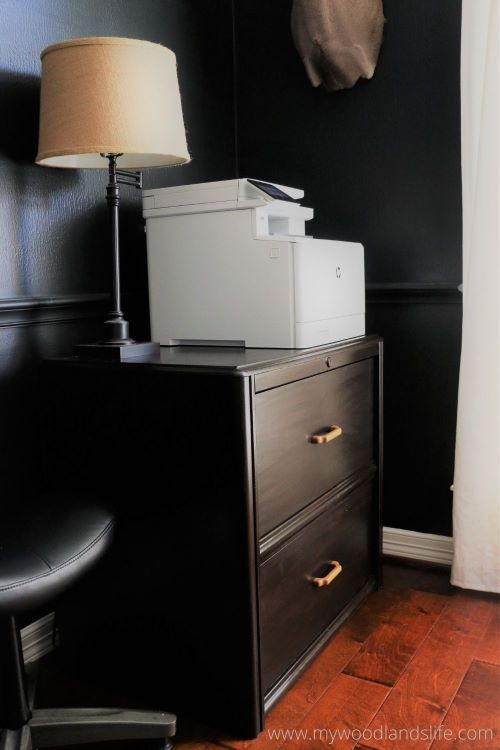
Mr. L and I recently purchased a used, lateral file cabinet for his office for $30. It was in great condition, but the style was dated and the entire file cabinet was constructed of laminate wood on top of plywood. Before we brought it into the house, I decided to try out my favorite fail-safe gel stain on the cabinet to see if I could bring the style into this decade. And it worked! Sort of. The funny thing is that I think we ended up with a piece that leans toward mid-century modern. However, mid-century modern is very much in style these days, and it adds to the masculine aesthetic of Mr. L’s office. I wanted to share my experience in case anyone else is faced with a seemingly impossible “wood” furniture project.

Gel Stain
I have listed out the supplies I used to refinish the file drawer below. But the real star of the show and my saving grace was this bad boy:

 (affiliate link)
I discovered gel stain during a nightmare IKEA hack several years ago in which I wasn’t able to sand their rock-hard finish off of a wood console table. Gel stain is different than regular wood stain in that it is more like a paint. It is not absorbed by the wood but rather dries on top of the wood (or laminate in this case) to give an appearance of stain. Accordingly I was able to paint it on top of my IKEA piece without removing all of the polyurethane top-coat. And in the case of my laminate file drawer, I painted it on top of the faux-wood grain to achieve the look I wanted.
I will note that in most cases a little bit of the gel stain goes a long way. I used maybe 1/8th of the pint when I stained my wood stair railing (more on that later). But I used the entire pint to achieve the dark wood look that I wanted for the file cabinet. So size up on the gel stain container if you have a larger project and are trying to go from a light to dark wood shade.
Supplies
- Sand paper (180 grit and 220 grit)
- Foam brush (2 inch)
- Clean rag or clean old sock
- Gloves (I used gloves similar to these
)
- General Finishes Oil Base Gel Stain in Java
- Minwax Wipe-On Poly Finish Clear Gloss (pint size)
(optional)
- Screwdriver (for removing handles)
Sanding the Laminate
I started the project by lightly sanding the entire file cabinet to ensure the gel stain bonded with the laminate surface. A LIGHT sanding by hand is key because the wood grain you see in laminate is printed—it is not real wood. You do not want to remove the wood grain appearance by sanding too vigorously.
I was out of 180-grit sandpaper, so I started with 120-grit sandpaper and then went over everything at the end with 220-grit. However, the 120-grit sandpaper ended up leaving a few scratches in the surface of the laminate that did not come out. They were not as noticeable when I applied the stain, but I recommend using a higher grit sandpaper to avoid scratching.
This is a closeup shot of the sanded laminate:
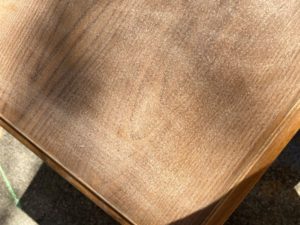
You can see how even a light sanding starts to remove the wood grain. I knew that I wanted the cabinet to have a dark wood in the end, so I wasn’t too worried about losing some of the grain.
Applying the Gel Stain
I have seen a couple of recommendations for applying gel stain online. I couldn’t remember which method I used for my console table, so I decided to try out both application methods to see which I preferred.
The foam brush method
The first application method I tried was using a foam brush to paint the gel stain onto the laminate. After applying the first coat, I became concerned. The stain was uneven and splotchy and was taking a while to dry (see the scratches too?).
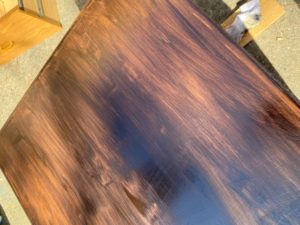
I actually sent Mr. L to the hardware store to buy mineral spirits so that I could remove the stain because the first coat looked so horrible. Luckily the first coat dried before Mr. L returned. And after I added the second coat to the top, I could tell that the stain was becoming more uniform in color. Obviously the main drawback to this staining method is that the stain takes FOREVER to dry. I applied the stain on a hot day in the sun, and it took a solid four to five hours to dry before I could recoat.
The wipe-on method
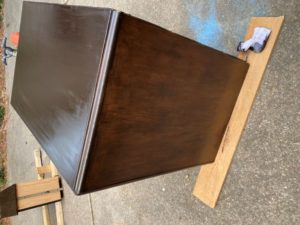
The second method of application is what I am calling the wipe-on method. You put on heavy-duty gloves and then wrap an old clean sock around your hand (or clean rag) and use the sock to wipe a thin layer of the stain onto the laminate. I liked this method because I got even coverage and the dry time was quick compared to the foam brush application (see the side of the cabinet below—this was after three coats).
The main drawback to the wipe-on method was that I needed to apply several thin coats to achieve the dark stain I wanted, which took a while. Indeed, after applying four coats, I went over everything with the gel stain on the foam brush and waited for it to dry overnight. Then I evened out everything using the wipe-on method for the final coat.
Staining conclusion
So which method is the best? In the end, I think I would use a combination of both. Start by applying a few coats using the foam brush method and then finish with the wipe-on method. Don’t get discouraged if it appears blotchy at first. And do note that the drying time can be quite lengthy if conditions aren’t perfect. Indeed, I am in the process of using the gel stain on my stair railing right now, and it is still drying after 5 days.
Protecting your project
In my experience, gel stain is pretty robust stuff after it dries. It is oil-based so it dries hard. Nevertheless, I went ahead and applied two coats of wipe-on polyurethane to the top of the cabinet because I knew the surface would be getting more wear-and-tear in Mr. L’s office. I’m not sure if the polyurethane coat was necessary, but extra insurance couldn’t hurt after I spent all that time waiting for the stain to dry.
Closing thoughts
In the end, I am thrilled with how the cabinet turned out. Outside in the sun, the stain took on a reddish-brown appearance, but when we moved it into Mr. L’s office, the dark java color came through. Perfection!
I’ll note too that we originally planned to change out the drawer pulls with brass or lucite hardware. Check these beauties out:


But when we put the old drawer pulls back on temporarily, we loved the contrast of the old laminate color with the new stain. Money saved for a future project!

Leave a Reply