
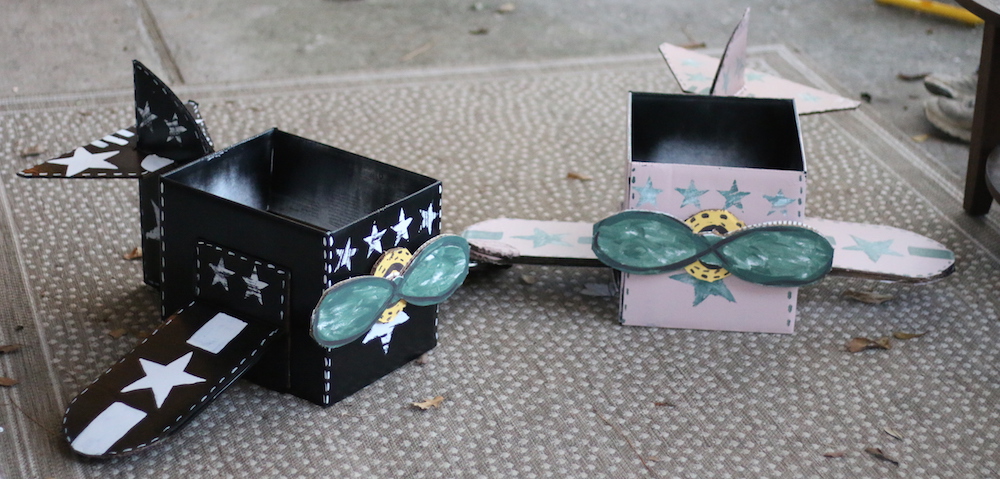
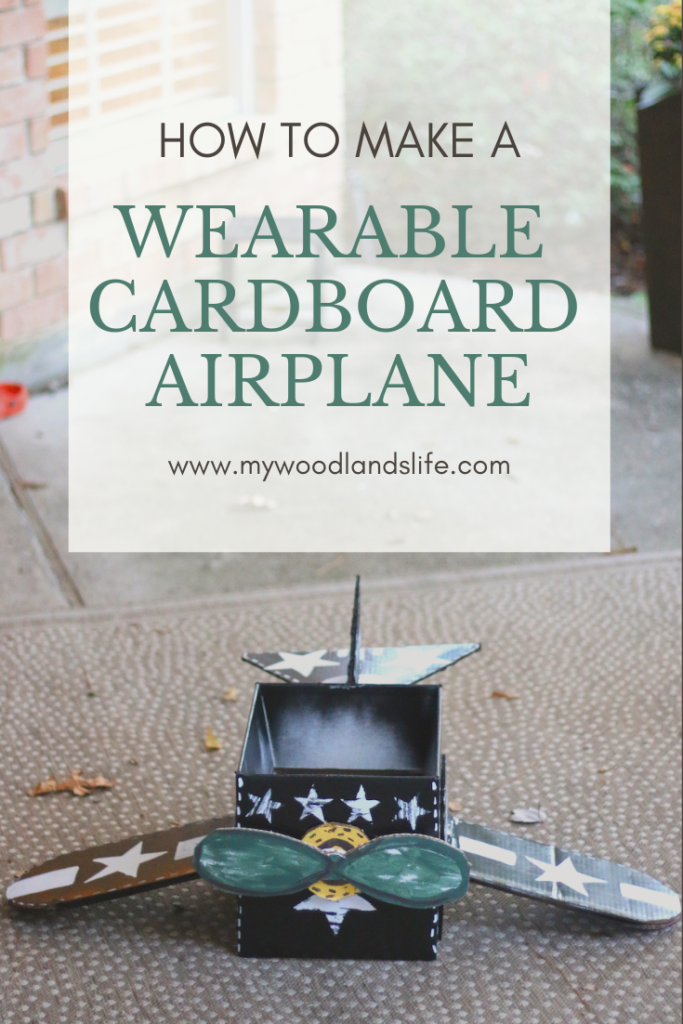
Happy Halloween everyone! We are geared up and getting ready to go trick or treating with Bammie and PopPop, rain or shine (though I think it will rain—waah!). I mentioned in my post earlier this week that Lamborghini is dressing up as a fighter pilot this year. The Dot is going as a pilot too, except she will be wearing a green bomber jacket and hot pink leggings. And speaking of gearing up, the airplanes are ready!!!!
I found a lot of inspiration on Pinterest for making cardboard airplanes, but I never found a good tutorial for how to do so. Plus, a lot of the airplanes that I found online were not wearable. So I thought I would share how I made the two airplanes for the kids in case anyone wants to whip out a hot glue gun and make their own.
The instructions that follow make one airplane. However, just add one extra diaper box if you want to make two airplanes. There is enough leftover cardboard on the Huggies box to make extra wings and tails and things like that.
I used diaper and wipes boxes here because I liked the thickness of the boxes, but really any thick boxes would work.
Also, as a reminder, please wear protective gear. I should have worn gloves when working with the utility knife, but as you can see in the photo, I didn’t. I highly recommend saving your fingers and wearing gloves.
SUPPLIES:
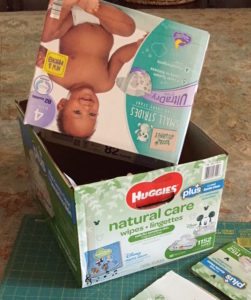
- 1 diaper box (big enough to fit your child)
- 1 Huggies bulk wipes box (really any large box will work)
- Permanent marker
- Hot glue gun
- Utility knife (I highly recommend this one
or this one
)
- Straight edge (like a metal ruler)
- Something to cut on (I like these self-healing cutting mats
)
- Straps (optional)
INSTRUCTIONS:
BEGINNING FOLDS & CUTS
- Fold in all of the flaps of your diaper box.
 This will add some structural integrity to the frame of the plane. Set it aside.
 - Use your utility knife to remove all of the flaps from the Huggies wipes box. The bottom part of the box is glued shut, so be careful when separating the flaps for removal.
MAKING THE WINGS
- Grab one of the four long flaps from the Huggies wipes box, and draw a half-circle on one end with your permanent marker.
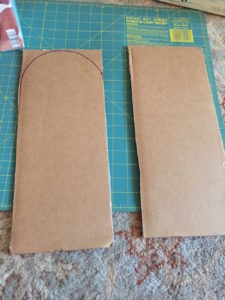 Use your utility knife and cut along the semi-circle to remove the outer corners. This will be part of one of your wings.
 - Use the wing you just made as a pattern for the other three long flaps.
 Trace the half-circle on one end of each flap and remove the excess material using your utility knife.
 - Take each wing piece and draw a line 5 inches from the straight (non-curved) end.
 Use your utility knife and straight edge to gently score along this line—DO NOT CUT ALL THE WAY THROUGH. The scoring will help form a bend in the cardboard.
 - Warm up your hot glue gun and glue two wing pieces together so that the scored part flares out. Repeat with the two remaining wing pieces.

- Use hot glue to attach the wings to the diaper box (the airplane body).
 I lined mine up with the bottom of the box so I didn’t have to worry about having uneven wings.
MAKING THE TAIL
- Go back to the Huggies wipes box and use your utility knife to cut the rest of the box at its seams. You will have four pieces—two smaller end pieces with handle holes and two longer edge pieces.
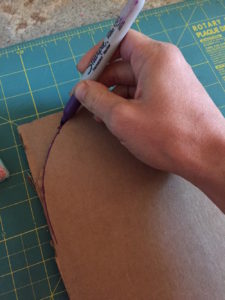
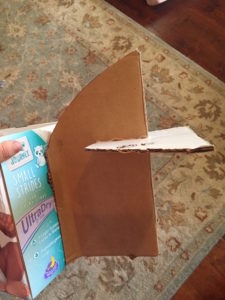
- Take one of the smaller end pieces (with holes) and, with the holed side pointing left, draw a straight line going up to the top of the hole that tapers out to the top right corner. I know those instructions are super confusing, so here’s a photo to explain:
 Cut along this line with your utility knife. This will be the airplane’s tail (or, more specifically, the vertical stabilizer on the back of the airplane).
 - Use your utility knife and cut a line that is perpendicular to the long edge of the tail and that starts opposite of the bend of the airplane. Again, confusing, so see this photo:
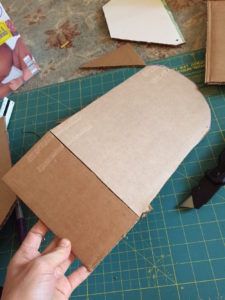
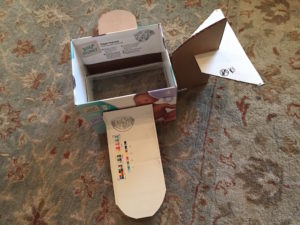
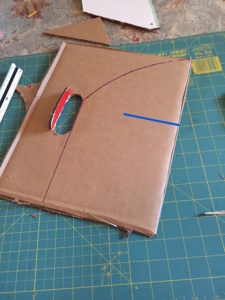 The blue line is where you cut. You’ll want to cut about 3 inches in and the cut will need to be thick enough for another piece of cardboard to slide into it. I basically made two cuts along the outside edge of the blue line, then pulled out the excess cardboard.
 - Use your utility knife to score into the shorter straight edge of the tail.
- Pull apart the cardboard along the scored area so that you have about 1 inch along both sides.
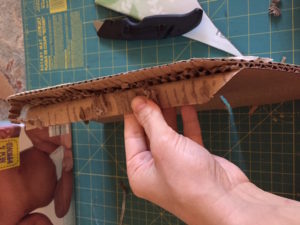 Fold down both sides. This will help you attach the plane’s tail to the plane body. (Alternatively, you could make a matching tail piece and score and glue them together like we did with the wings—this would make the tail a bit more stable. I didn’t do this because I needed to make two airplanes).
 - Now go back to your Huggies wipes box pieces and find this bottom flap piece:
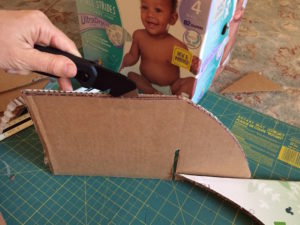
 If you’re using a Huggies box, it will already have two perforated lines on it. Use your utility knife to completely cut along these perforated lines. You’ll discard the triangles. (If you’re not using a Huggies box, make a trapezoid out of one of the box flaps). This will be the plane’s horizontal stabilizer.
 - Insert the horizontal stabilizer (the trapezoid piece) into the 3-inch incision you made into the curved tail piece.
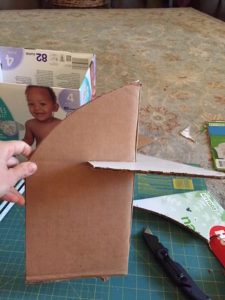 Hot glue along the seams to keep it in place.
 - Glue the tail piece onto the airplane by spreading apart the scored end, adding hot glue, and pressing it against the back of the plane body.
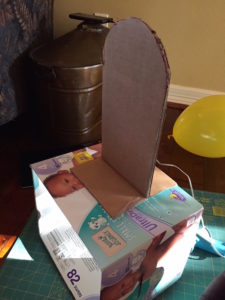
- Your plane should now look like this:
MAKING THE PROPELLER
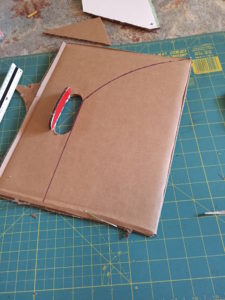
- Take one of your leftover flap pieces and draw a propeller.
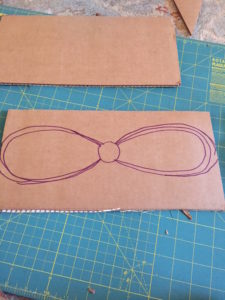 This instruction may sound daunting, but you can see by my sketch that it’s not too difficult. Basically looks like a bow-tie. Use your utility knife to cut out the propeller.
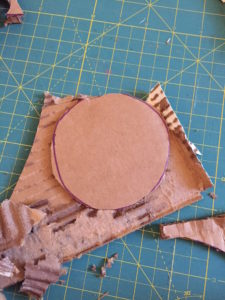
 - Draw a circle (or trace a round can or lid to make a circle) to fit behind the propeller.
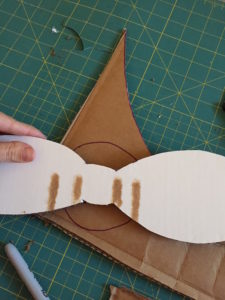 You’ll want the circle to be roughly as wide as the propeller blade is high (or larger).
 - You can choose to attach these pieces to the plane body now, or hold onto them and paint them separately and then attach. I opted to glue the propeller onto the plane because I ran out of time, but you could get technical and use a bolt with two nuts to have a spinning propeller.
FINISHING TOUCHES
- This is where you can basically do whatever you want. I spray painted one plane black and the other pink and then used leftover 8oz sample wall paint colors to add more detail in contrasting colors. I’ll do a post later on how I achieved the look. Stickers would be a good option too.
- You can also attach straps to the plane so your child can wear it on his or her shoulders. I haven’t done this part yet, but hope to get it done before the kids head out tonight.
ADDITIONAL TIPS
- If you have trouble cutting through the thick cardboard boxes, try cutting through one layer of the cardboard and then manually tear away the top half of the cardboard from the part that will be discarded.
 Use your utility knife to cut the remaining thinner section away.
 - If you want to make two planes with an extra diaper box, you’ll need to use the two long sides of the Huggies wipes box to make the wings for the second airplane. They will be a bit shorter than the wings on the first airplane, but they’ll still look cute. You should have enough pieces left over for the other parts of the plane.
- Spray paint makes the painting process go a LOT faster. Again, use safety protection when painting.
- You can probably tell from the final photo at the top that the wings on the black airplane dip down a little bit. The wings on the pink plane are the height of the Huggies wipes box, and they are still sitting straight. If you want wings that do not dip, shorten the length of the wings to 10 inches. You’ll want to score the end flaps at 1-2 inches instead of 5 inches.
And that’s it! The construction process took me less than an hour. Painting took longer because of drying time, but this could technically be done in a day. Hopefully my instructions make sense, but please let me know if I missed something.
Leave a Reply